Create a Small Game from Scratch Series: Endless Standing First-Person Shooter
Level: Beginner
Type: Blueprint
Version: 5.6
Download Project
Last time, we created the lighting scenario system. Now, I’d like to add more weapons to the project. The first one will be the Shotgun.
Please keep in mind that this post contains maybe too much gore—but hopefully, you get the idea.


- Hi Level
- Data
- Starting with Shotgun
- Fixing Projectile Mechanics
- Fixing Weapon Ammo
- FX – Projectile Tracer
- FX – Headshot
- Conclusion
Hi Level
With our current weapon system, adding another weapon should be straightforward. But as always, there’s a chance we might have overlooked something. That’s why it’s a good idea to implement a couple of prototype weapons to test the overall functionality.
Here are my goals for the Shotgun:
- Use Projectiles instead of Traces – This will help us verify that everything is working as intended.
- Add projectile bounce – We’ll test if this works correctly. This will also have gameplay impact, as shotgun pellets will bounce and can randomly hit targets.
- Close-range effectiveness – The shotgun should excel at eliminating nearby enemies or spreading damage across small enemies (which we don’t have yet).
- Headshots for the infiltrator enemy – I’d like to implement some kind of headshot mechanic specifically for this enemy type.
Data
I’ve prepared several assets for the shotgun:
DA_Shotgun.
Weapon mechanics configuration. The Primary fire will shoot 4 bullets, while the Tertiary fire will shoot 8.
A new gameplay tag for Shotgun Ammo has been added, and player ammo is now separated from AI ammo.
DA_ShotgunAudioVis.
Using the same mesh as the Infiltrator. A new crosshair specific to the shotgun has also been created.
DA_Ammo_Shotgun.
As mentioned earlier, the ammo uses projectile mechanics with bounce enabled. Check the configuration.
Each bullet has lower damage compared to the pistol, as the shotgun is intended for short-range combat or eliminating smaller enemies.
DA_Ammo_ShotgunAudioVis.
Created a projectile tracer (we didn’t have one before). FX details will be described later.
DA_Ammo_ShotgunHitAudioVis.
Similar to the pistol version. We can add more custom audio/visual effects for shotgun hits if needed.
Starting with Shotgun
For now, there’s a single place to set up the player’s weapon—inside STGameplayPlayerPawn.
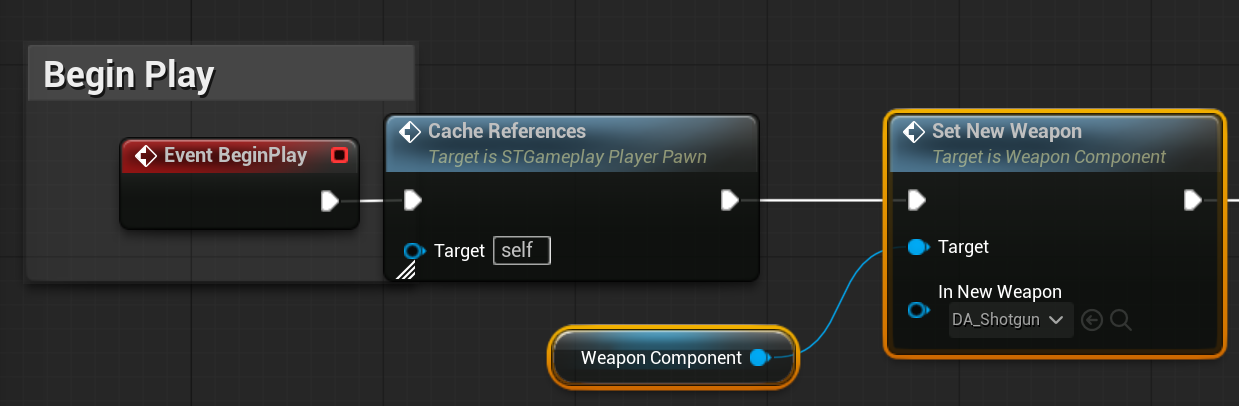
Later, we’ll implement an inventory system to handle weapon swapping.
Fixing Projectile Mechanics
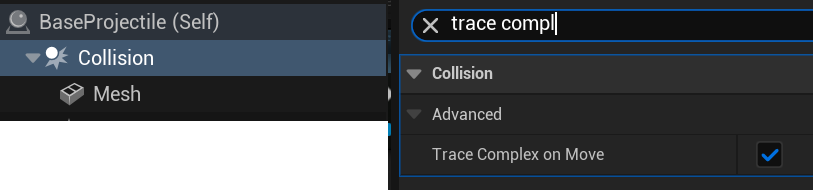
Trace Complex on Move
Currently, our projectile stops on simple collisions. While that’s usually fine, in our case we want more precise hit detection. To fix this, we need to enable Trace Complex on Move for the collision component in BaseProjectile.
BaseEnemy Capsule
The Capsule Component in our Base Enemy currently registers collisions with projectiles. We need to disable this so that collisions are detected only on the skeletal mesh instead.

By the way, there’s a great GDC presentation about collision handling you should check out.
Pooling and Niagara
Since this is our first time using FX in projectiles, we forgot to enable the Niagara system when a projectile is taken from the pool. Check out the UpdateAudioVisual function — after assigning the Niagara asset, we now make sure to activate the Niagara component.

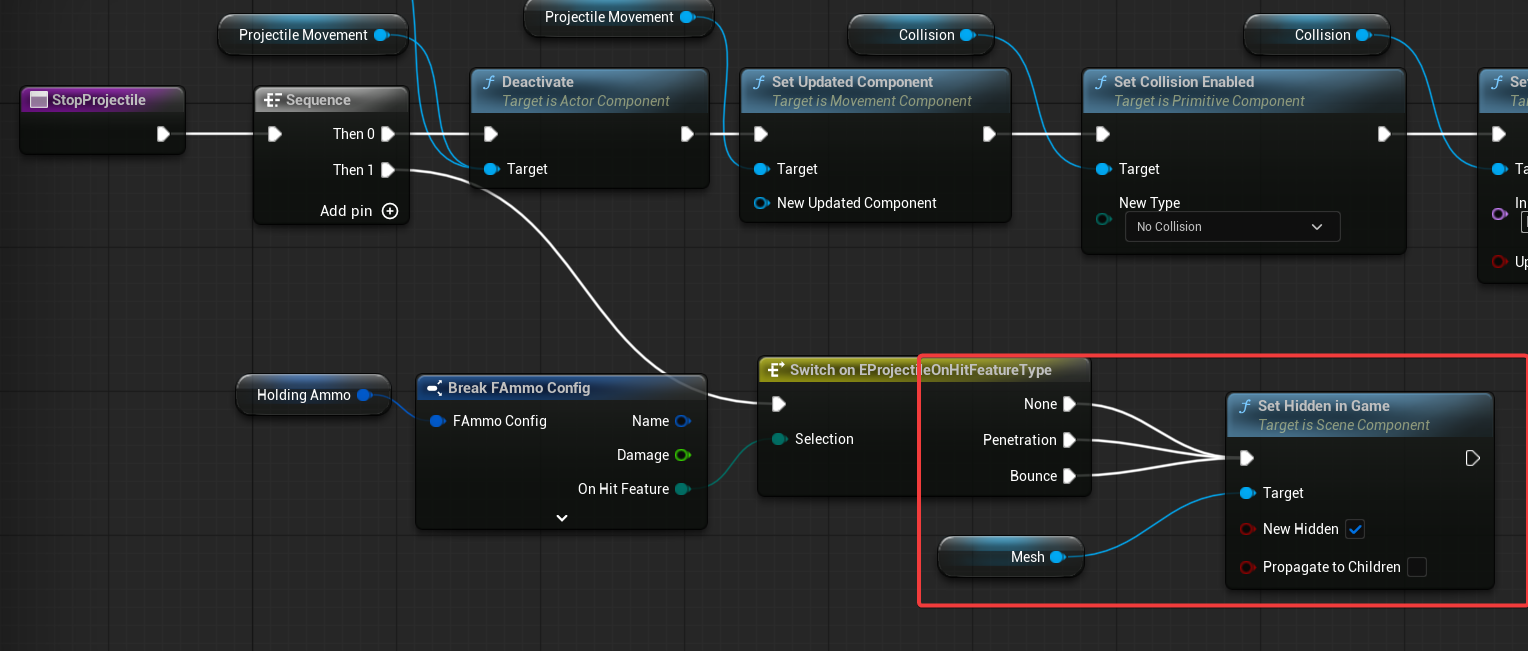
Another important point: we don’t want the Niagara effect to deactivate or hide when the projectile stops. (trail should be visible) We want the trail to remain visible after the hit. That’s why, in the StopProjectile function, we don’t hide the entire actor—only the mesh is hidden.
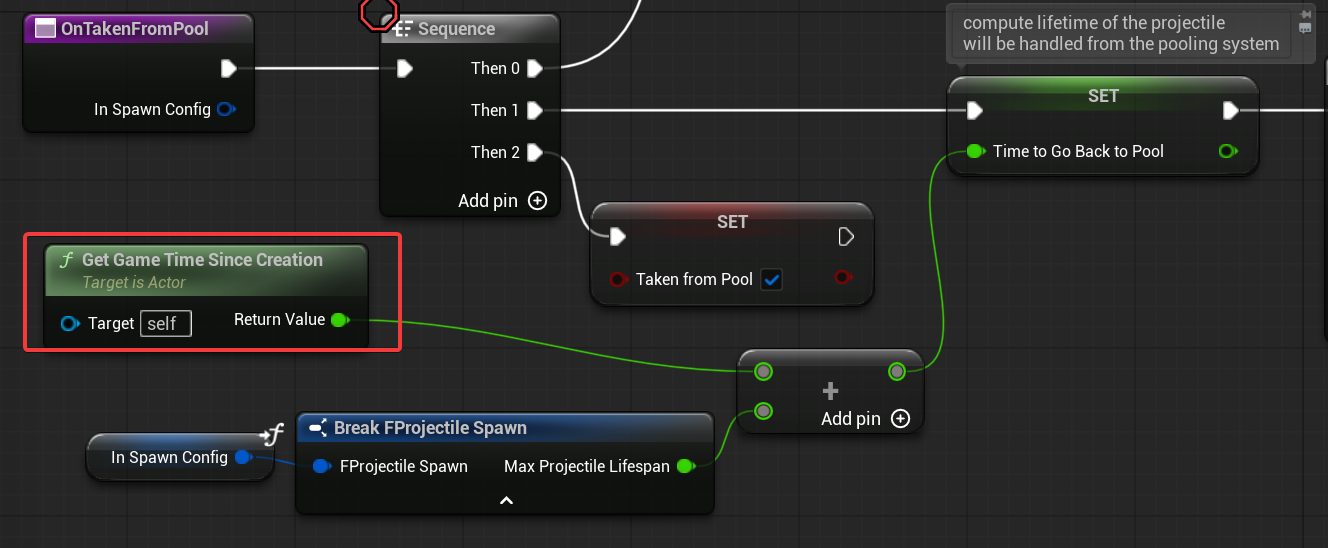
I also discovered that BaseProjectile is incorrectly setting TimeToGoBackToPool. It should use GetGameTimeSinceCreation, just like in ProjectilePoolingManager.
💡 Note: As you can see, we didn’t catch these issues earlier because we hadn’t really used projectiles much—we only ran a small number of tests. Now, with over 70 projectiles spawned simultaneously, complete with audio and visual effects, we can thoroughly test the system and catch problems much more effectively.
Fixing Weapon Ammo
Currently, when we shoot 4 bullets at once, the WeaponComponent checks if there are enough bullets in the magazine to fire all 4. For the shotgun, I’d like to allow firing even if there are only 3 bullets left — it should just shoot the remaining bullets in the magazine. This functionality doesn’t exist yet, but it can be easily added by modifying the HaveAmmoInMagazine (link) function.

Next, in IntendToFire, update the ammo check to also consider the available ammo count.
I’ve also modified the FireBullet function to check for ammo in the magazine before firing and to decrease the ammo count after. Thanks to these changes, the weapon will fire the remaining bullets even if it’s less than the usual shot count.
💡 Note: Once again, as you can see, we’re making changes to the core systems we implemented earlier. This is completely normal—you shouldn’t be afraid to iterate on your mechanics. Also, don’t forget to implement placeholder elements to test your mechanics thoroughly after releasing a system. In this case you should implement shotgun weapon and maybe other ones to test out the functionality we implemented.
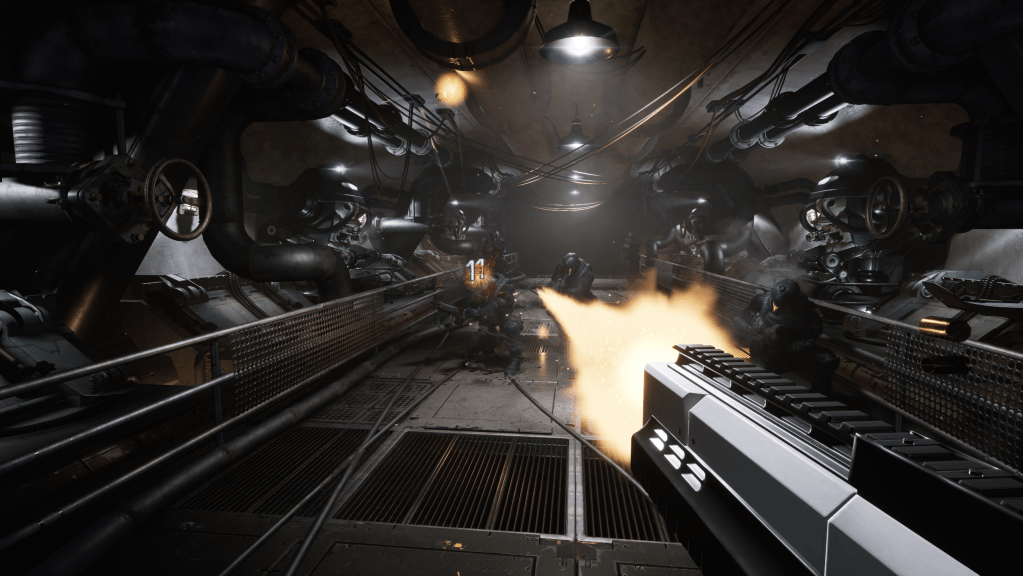
FX – Projectile Tracer

Since we’re using projectiles, we can leverage the Ribbon Renderer to create the beam visualization. Check out the NS_ProjectileTrace system.
The material is simple — just a mask with some added noise for effect.

For the system itself, pay attention to:
- Spawn Per Unit: This spawns ribbon segments based on the distance the projectile travels, making it ideal for moving projectiles.
- Ribbon Renderer: It has various UV settings to better showcase our material’s look.
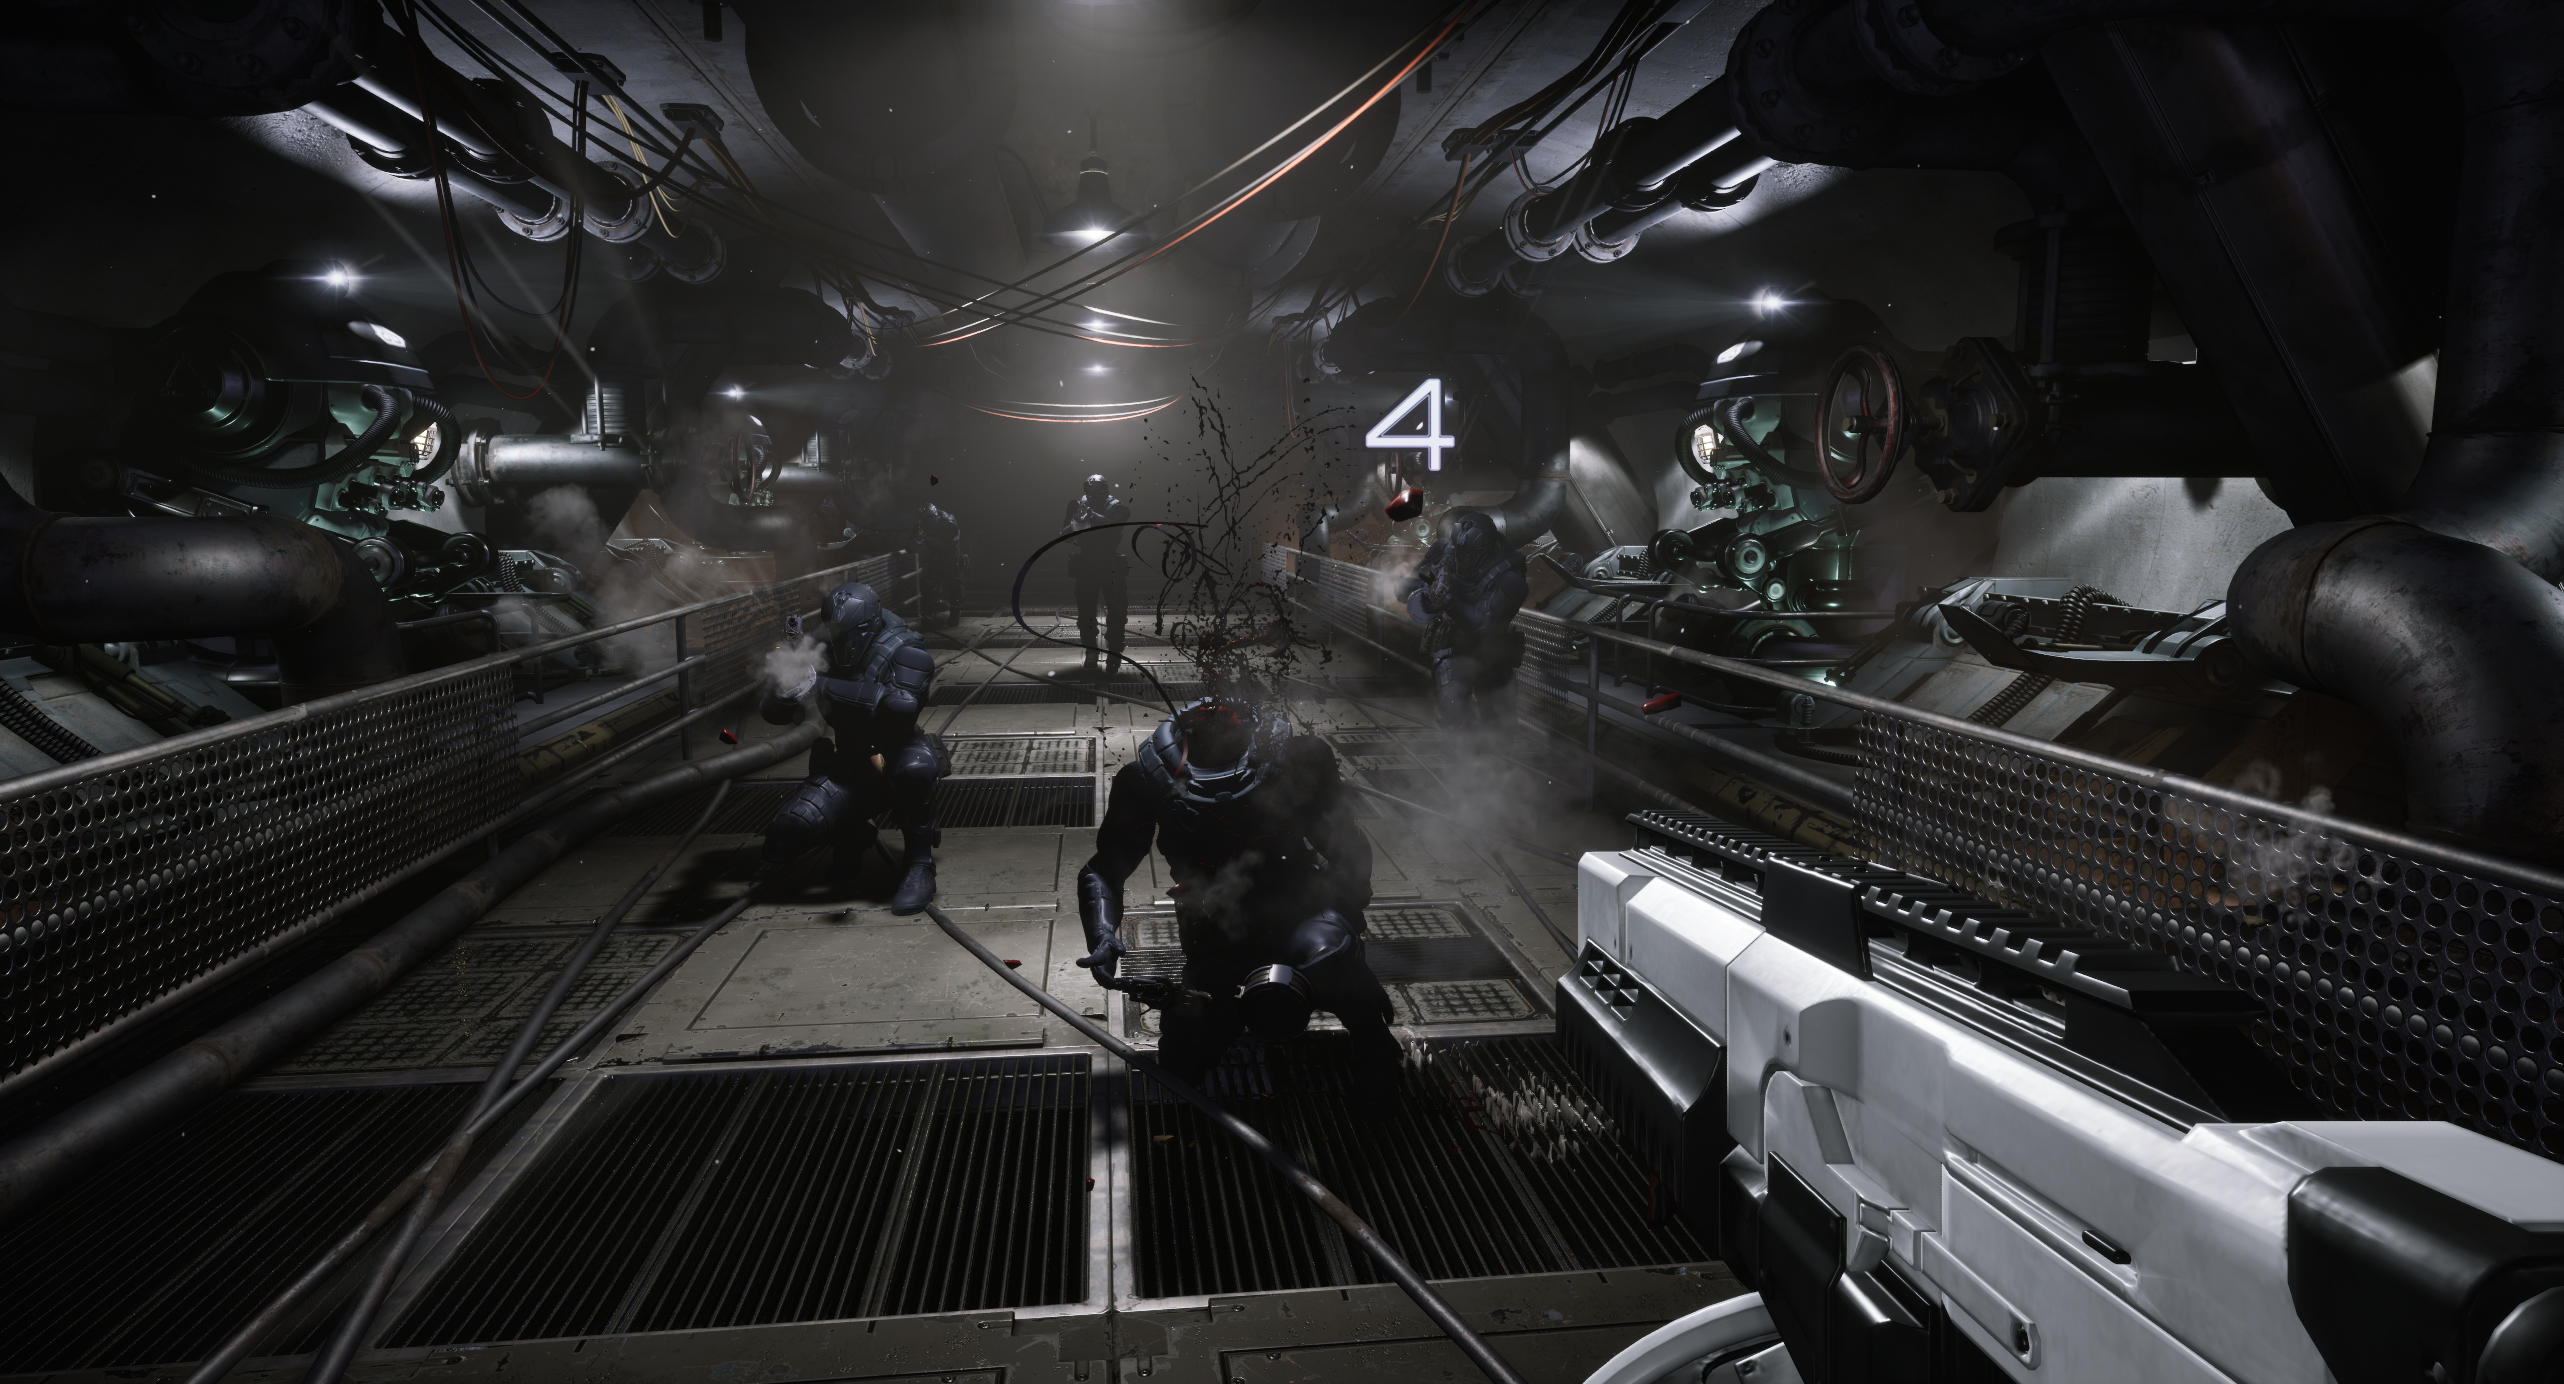
FX – Headshot
There is couple of things I would like to adress for the headshot:
- Should fire only when we are eliminating Infiltrator
- Should fire only when we hit using shotgun
- Should fire only when we hit head
We already have OnDeath (link) function we can use.
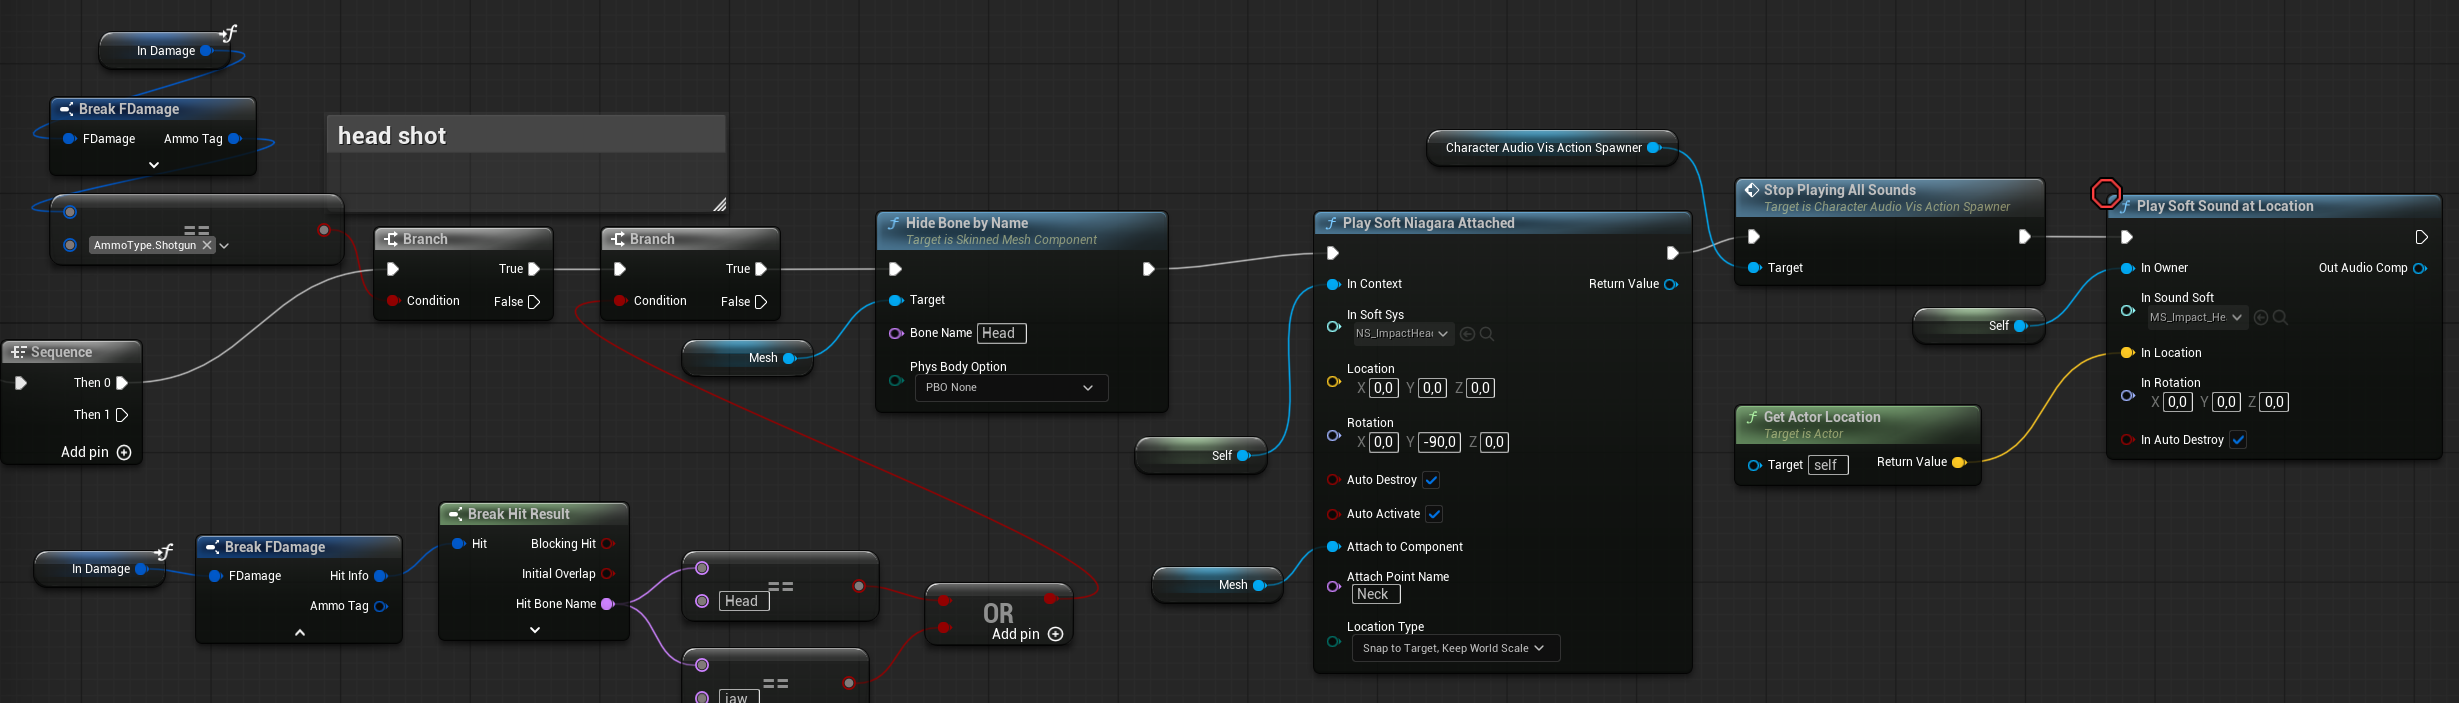
First, we check if the damage comes from shotgun ammo. Next, we verify if the hit was on the head or jaw bone.
Then, we use HideBoneByName to scale down (hide) the head. After that, we spawn the FX and stop all character sounds—since the character shouldn’t make damage or death sounds without a head.
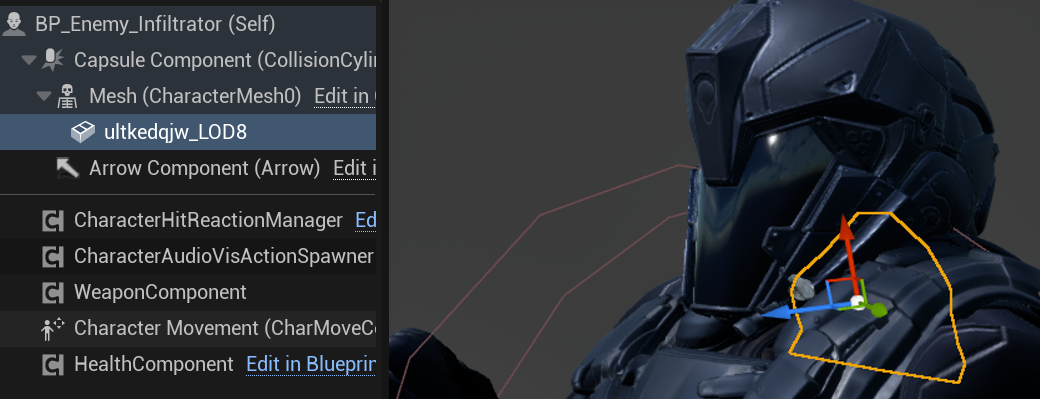
Also check out that there is some neck mesh inside Infiltrator.
💡 Note: There are many ways to implement body disassembly in Unreal Engine. Keep in mind this tutorial shows the simplest method, as it’s intended for beginners.
- Skeletal Mesh Sections
These are additional mesh sections within the skeletal mesh that you show or hide depending on which body part was hit. This approach gives you the most visual control over the effect since the graphics artist prepares each disassembly. This solution can also be combined with dynamic mesh slicing. - Dynamic Mesh Slicing
This method converts the Skeletal Mesh (SKM) to a Static Mesh (SM) or Dynamic Mesh and performs runtime slicing. You can try this out, but it’s generally not optimal for performance. - Break Bones
Instead of hiding bones, you can break them to detach limbs like legs or hands. This works well for robot characters or fantasy skeletons without complex skinning. - Render Target Hit Mask
You can use a render target to mask out the disassembly. This method is also useful for more advanced damage indicators. Keep in mind that using Niagara for render target rendering is much more efficient than Blueprint-based render targets.
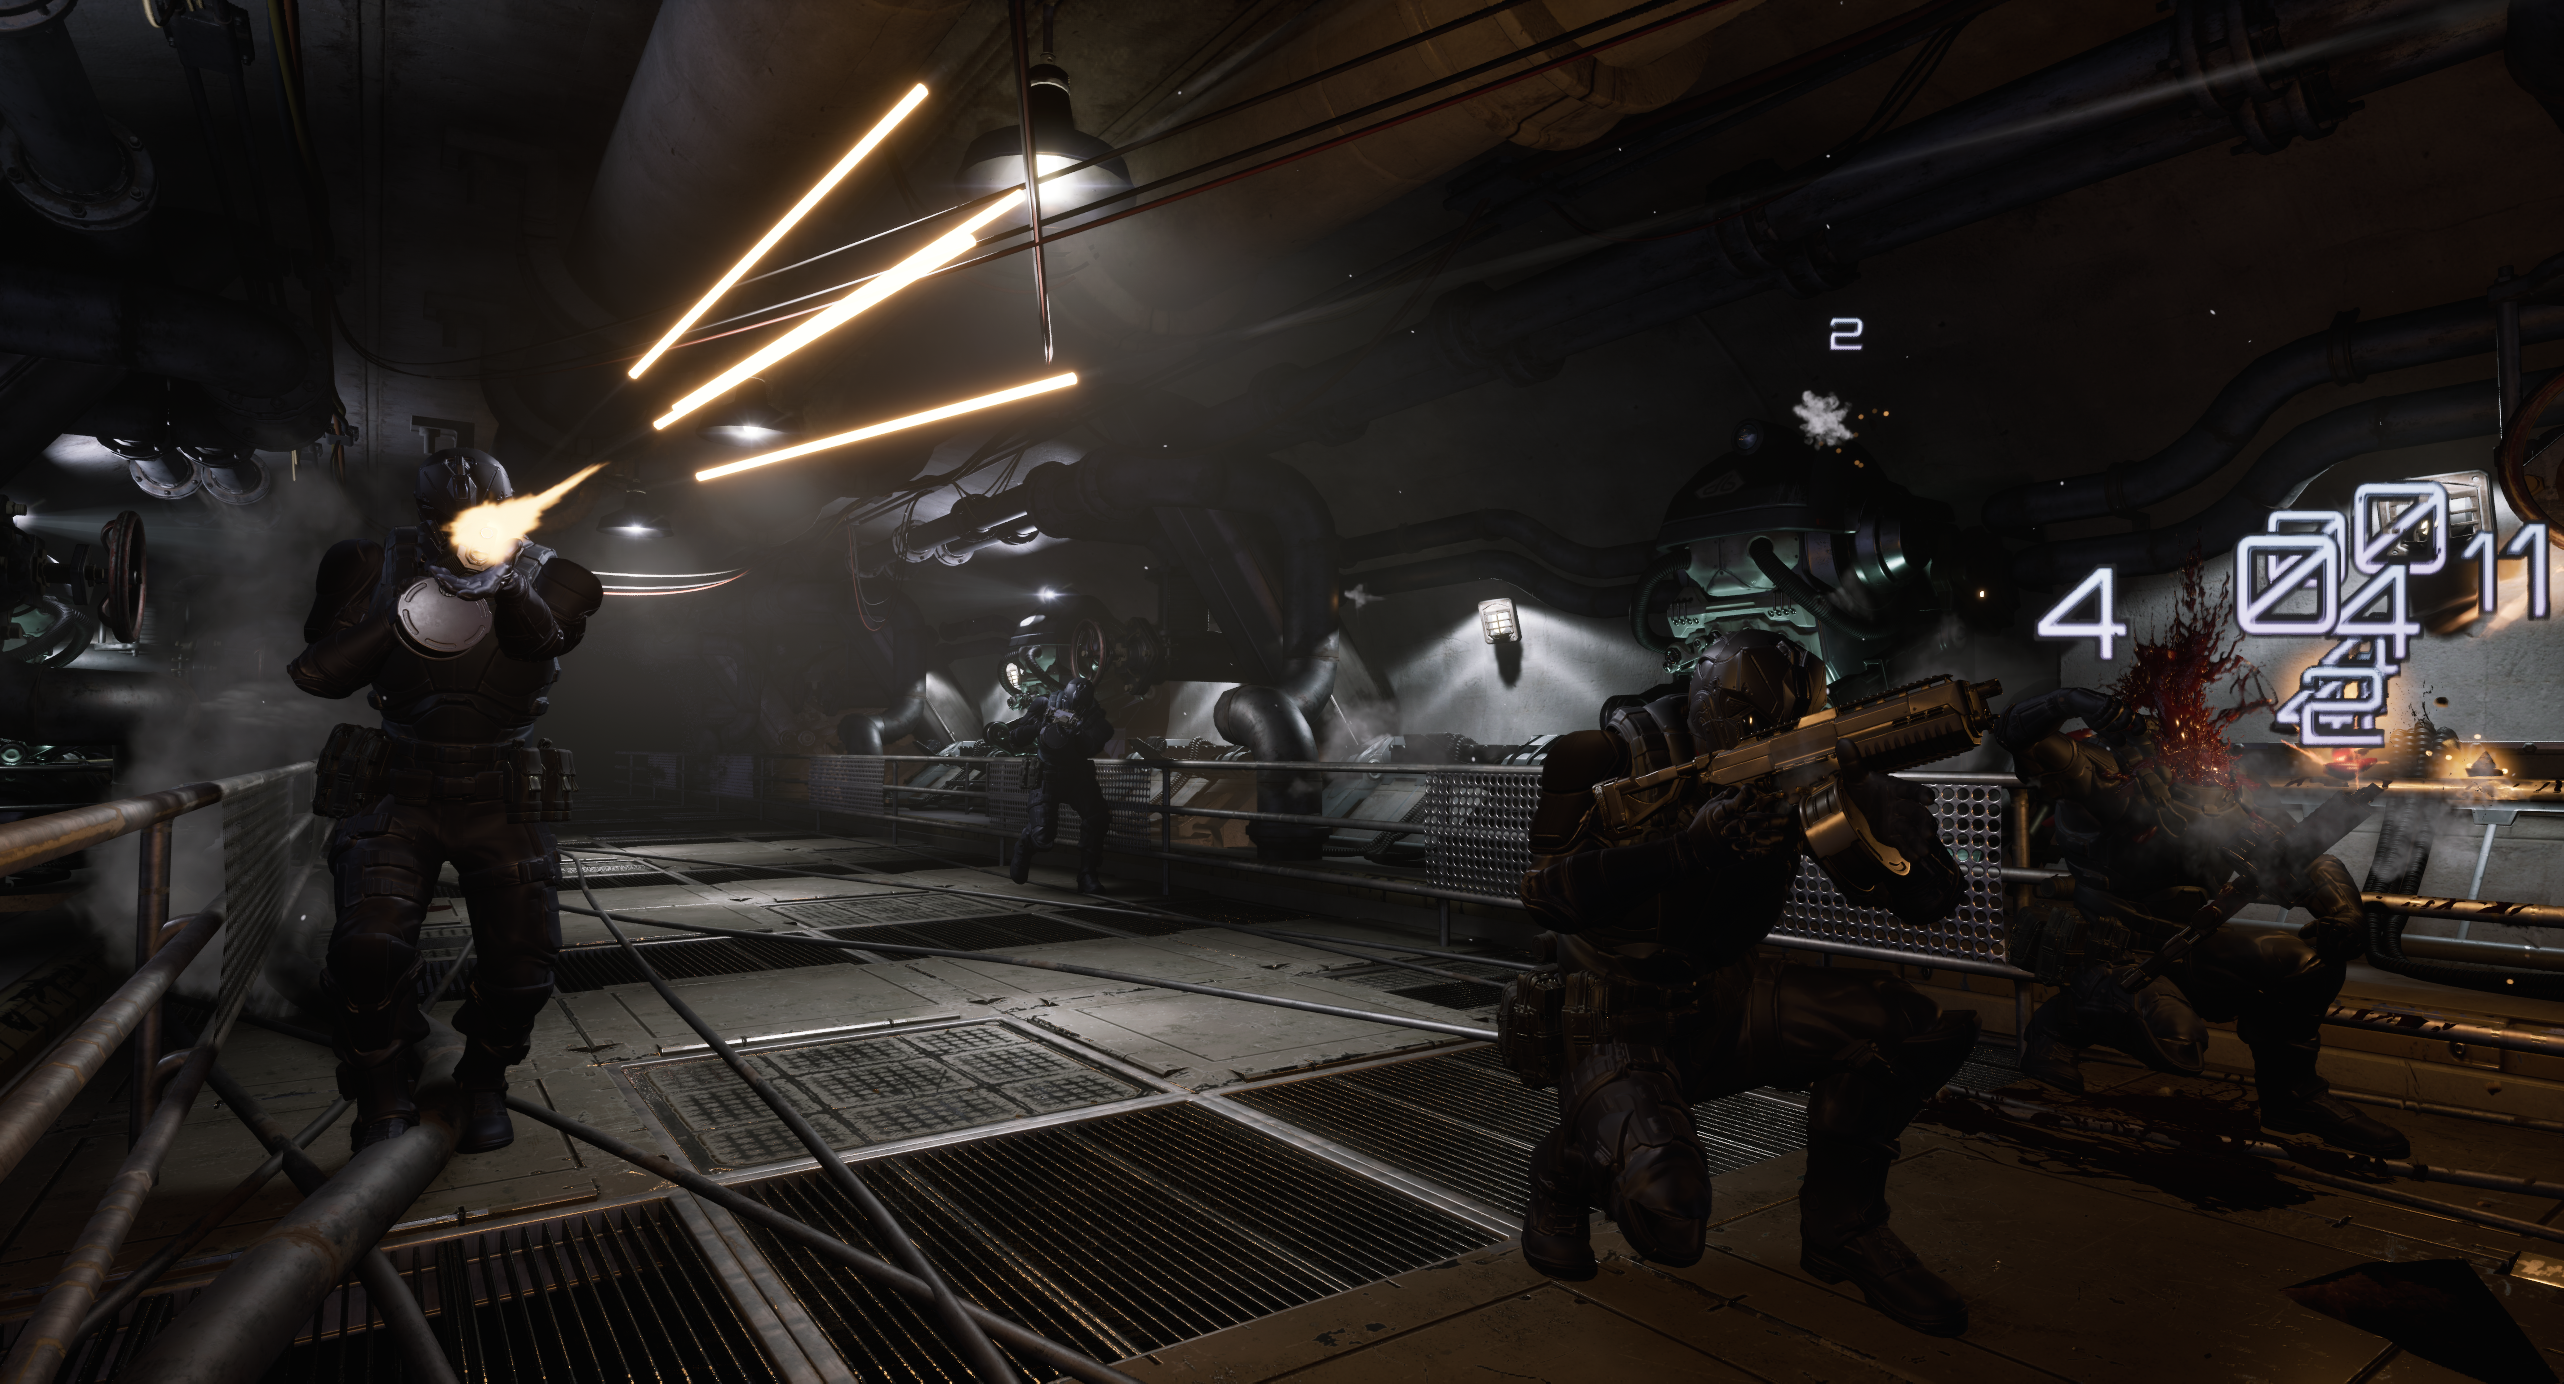
NS_ImpactHeadShot
I’m using splash effects from the flesh impact reactions created earlier, but I’ve tweaked their sizes and lifetimes. There’s also a mesh renderer to show some gibs. Of course, you can slice the infiltrator’s head for a dramatic 1v1 head explosion. The blood lines are just ribbons, which can be adjusted so they don’t stretch too long. I aimed for a more cartoony feel with these effects.
Basically, you could spend days tweaking effects like these to make them better and better.
Conclusion
We’ve added a new weapon and improved some of our core mechanics in the process. We also implemented basic effects—maybe a bit too much gore—but hopefully, you get the idea.
Now, it’s time to move on to the next weapon: the Rifle. Stay tuned!

You must be logged in to post a comment.