Create a Small Game from Scratch Series: Endless Standing First-Person Shooter
Level: Beginner
Type: Blueprint
Version: 5.6
Download Project
Last time, we generated our level using PCG and added some basic lighting. Now, I’d like to describe more lighting-related features.
- Hi Level
- Data
- Data – LightingScenario
- Lighting Manager
- Lighting Preset Editor
- Nanite?
- Virtual Shadow Map?
- Lumen?
- Deferred Renderer?
- Conclusion
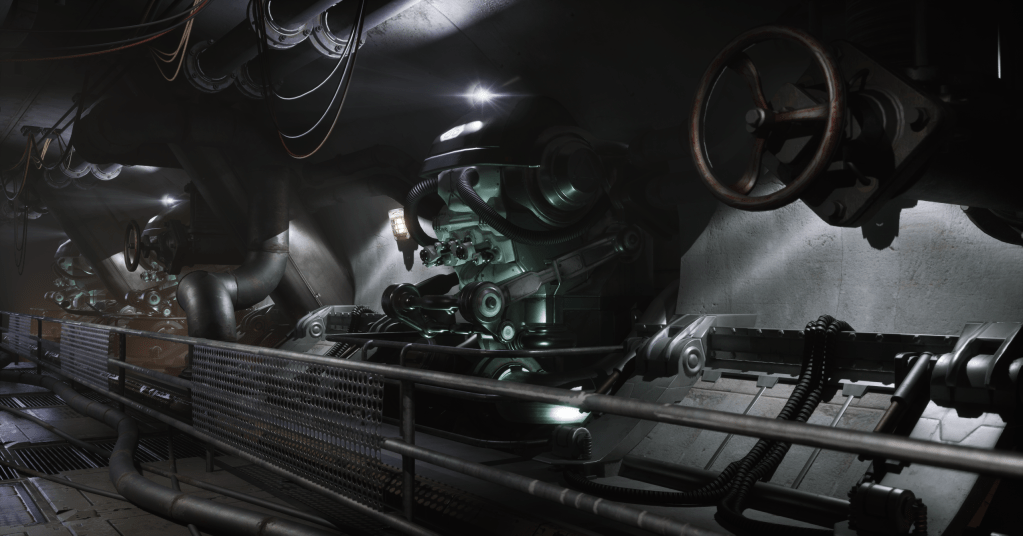
Hi Level
When I talk about “lighting,” I mean much more than just lights. It’s closely tied to the overall look of the game and includes post-processing, fog, sky dome, clouds, and more. When working on lighting for any game, I have several goals:
- Lighting presets: I want the ability to create lighting presets without modifying the level or its data.
- Scenario testing: With presets, I can quickly test different lighting scenarios for the game and swap between them easily.
- Level variety: Presets make it easier to create different lighting setups for different levels.
- Controlled variables for artists: I want to define which variables artists can change—so they adjust only what I allow. For example, they shouldn’t be able to modify critical settings like shadow resolution.
- Defaults: I want to be able to set default values.
- Console commands: I want to define console commands, such as decreasing cascade counts or disabling VSM.
So, we’ll be creating a simple lighting scenario system that can be extended to fit your needs.
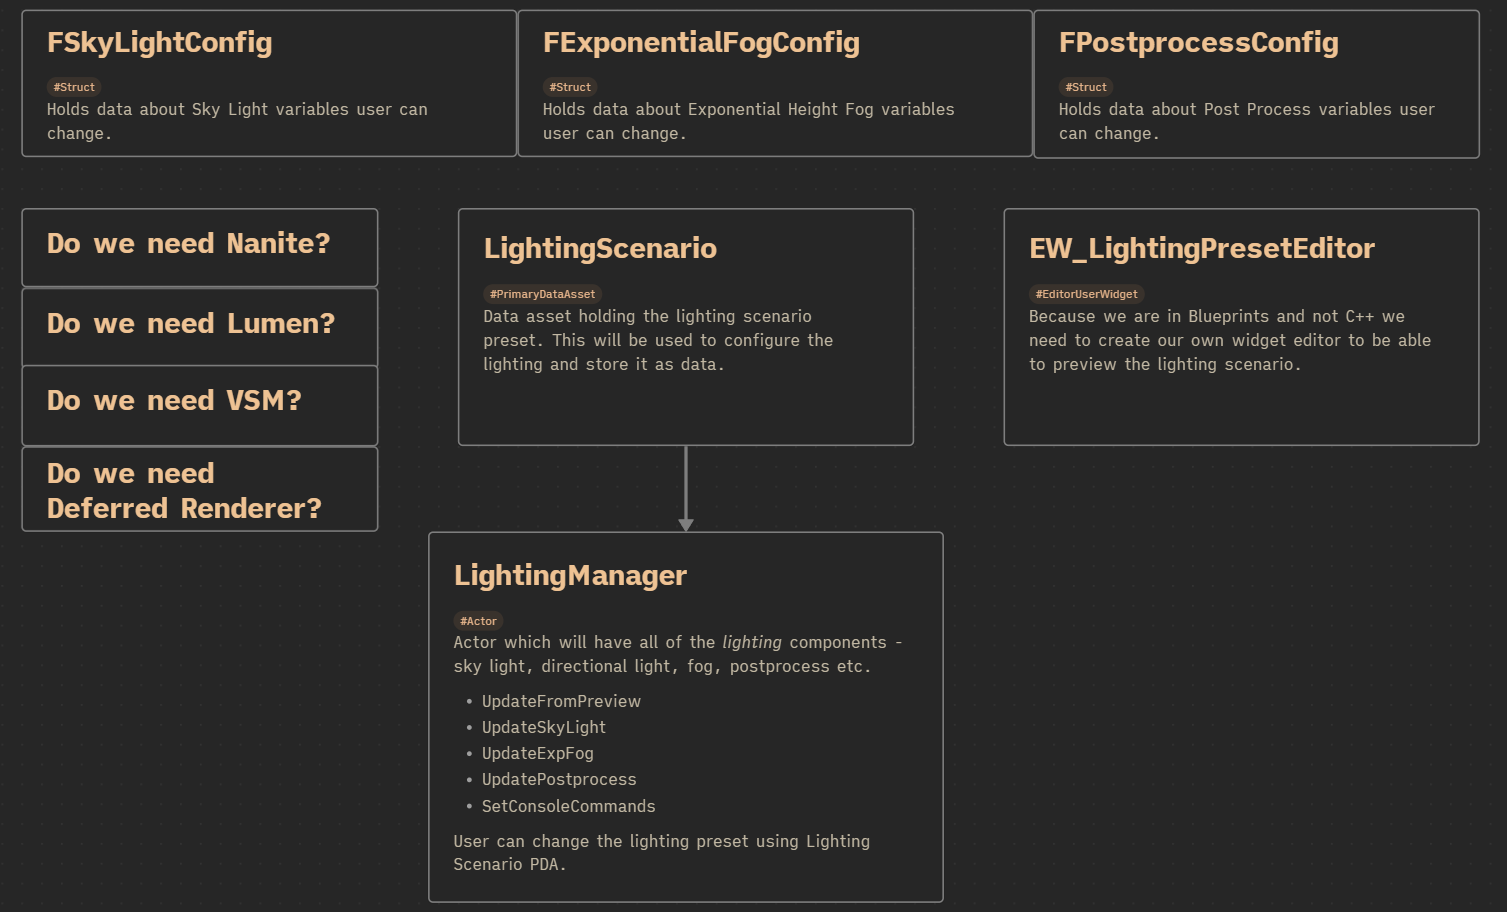
Data
FSkyLightConfig. This struct holds the configuration for the sky light. You can add any variables you want the graphics artist to be able to change.
| bEnabled | bool | Ability to show or hide the sky light. |
| Color | Linear Color | Sky light color. |
| Intensity | float | Sky light intensity. |
| Cubemap | Texture Cube Soft Ref | Sky light cubemap texture. |
FExponentialFogConfig. The same concept as FSkyLightConfig, but for exponential fog. You can add more variables here if needed
| bEnabled | bool | Ability to show or hide the exponential fog. |
| Fog Density | float | Density of the fog. |
FPostprocessConfig. This struct defines post-processing settings.
| bEnabled | bool | Ability to show or hide post-processing. |
| Settings | Post Process Settings struct | Holds the entire post-process settings struct. |
💡 Note: Giving full access to this struct is generally not a good idea, because the graphics artist could change critical features like reflections or global illumination. This is just an example—normally you would create a custom post-process data struct containing only the parameters you want the graphics artist to modify.
Data – LightingScenario
This is our primary data asset that holds all the lighting-related configuration structs.
| SkyLight | FSkyLightConfig | Holds data about the sky light. |
| ExpFog | FExponentialFogConfig | Holds data about the exponential fog. |
| PostProcess | FPostprocessConfig | Holds data about post-processing. |
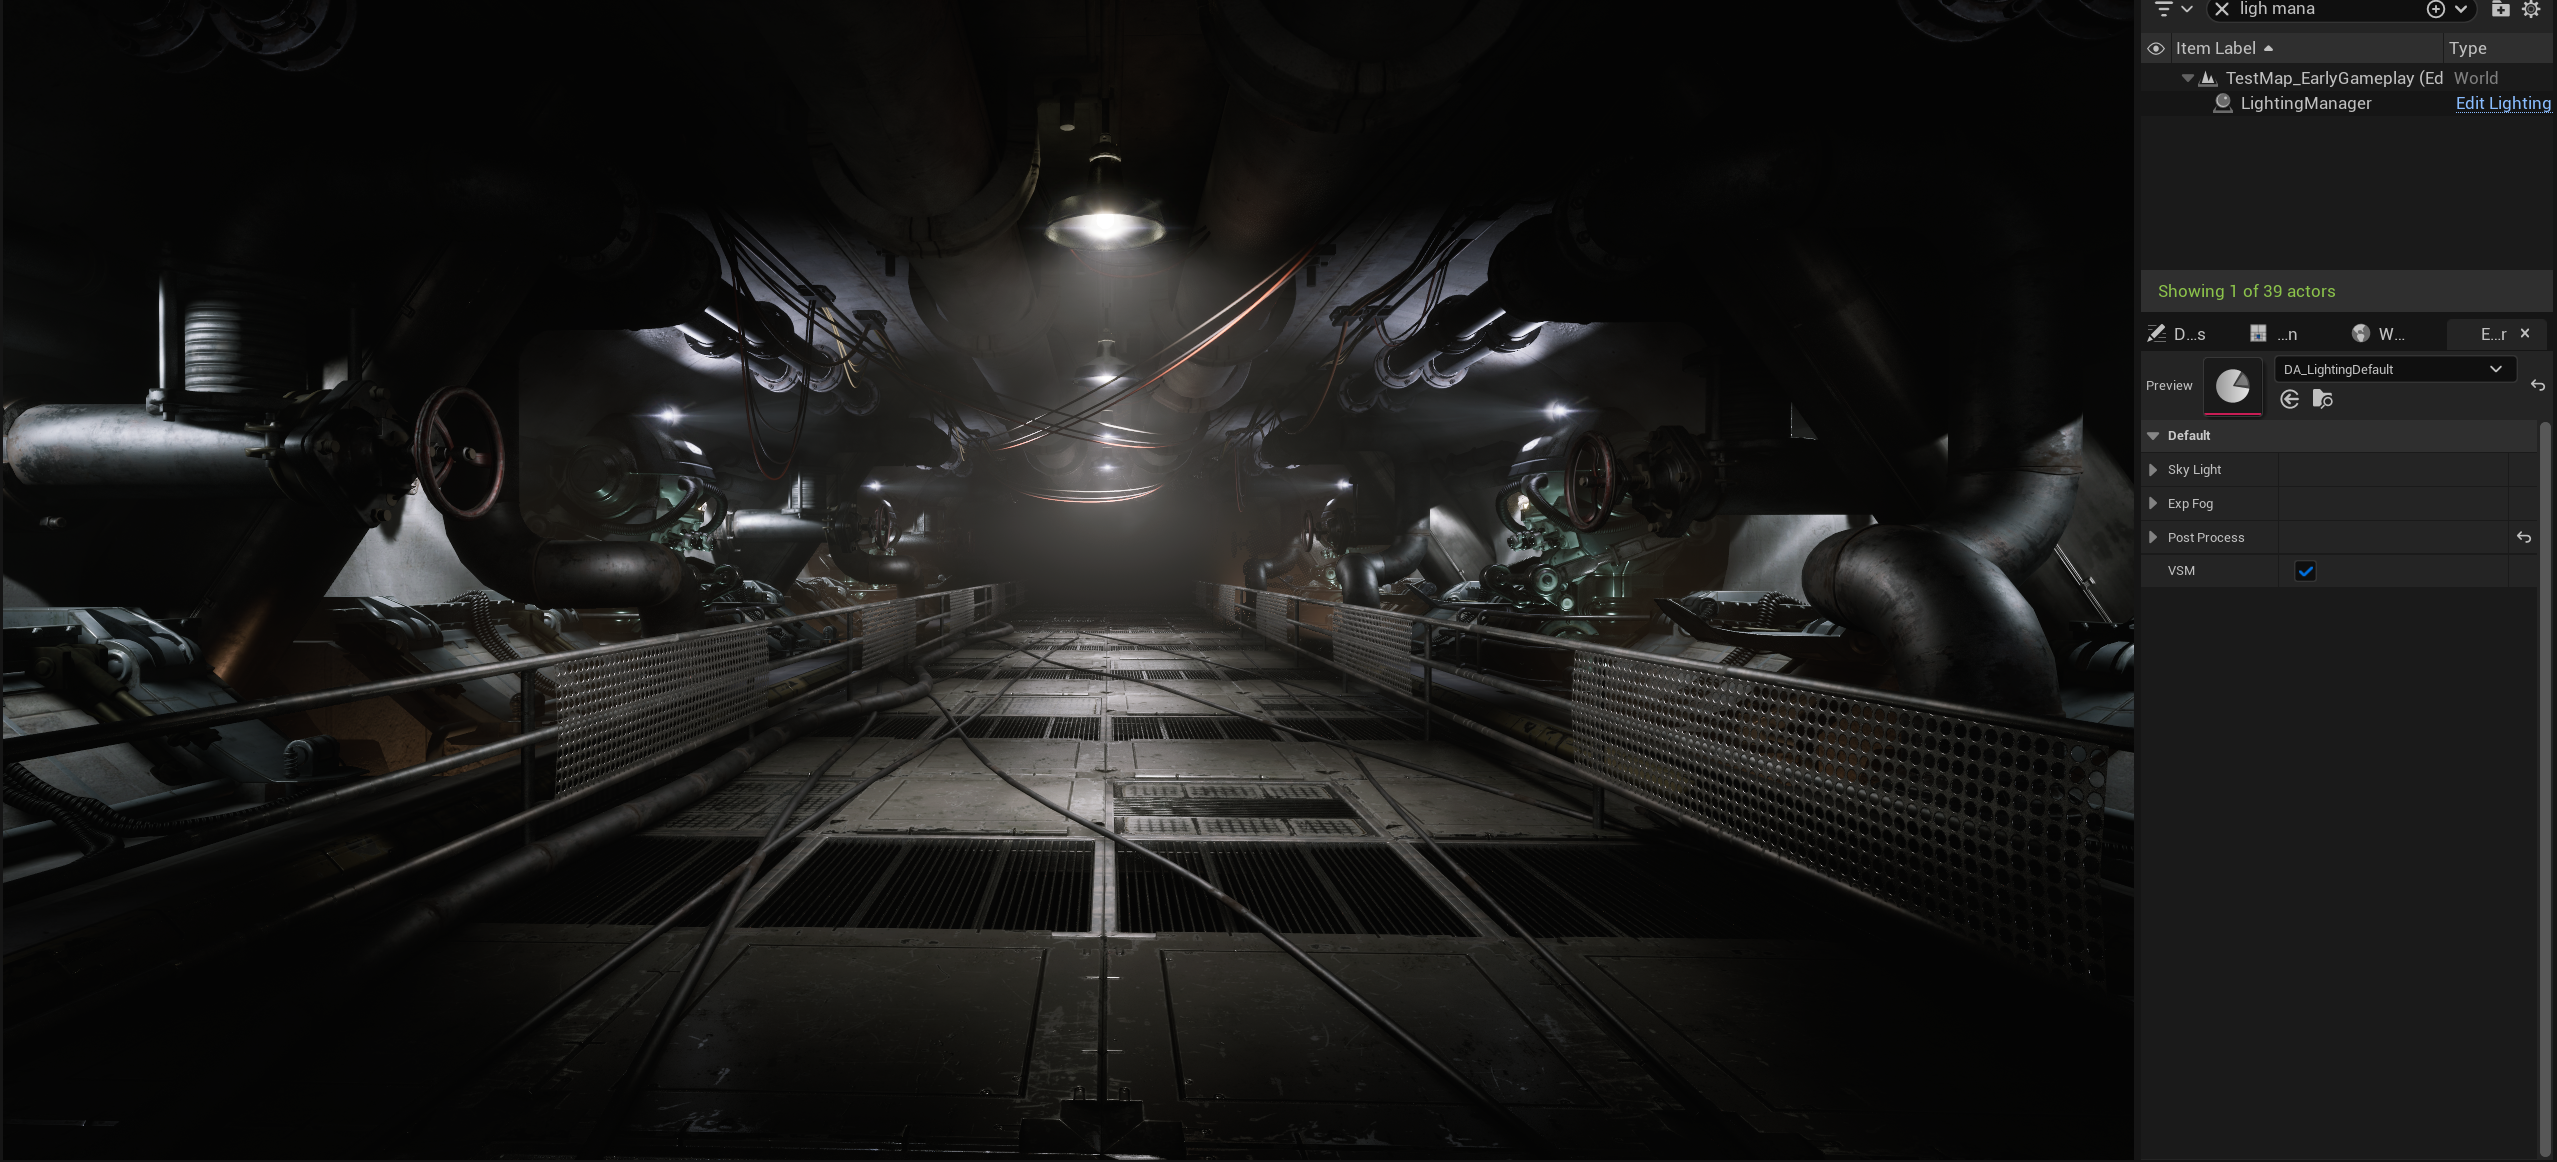
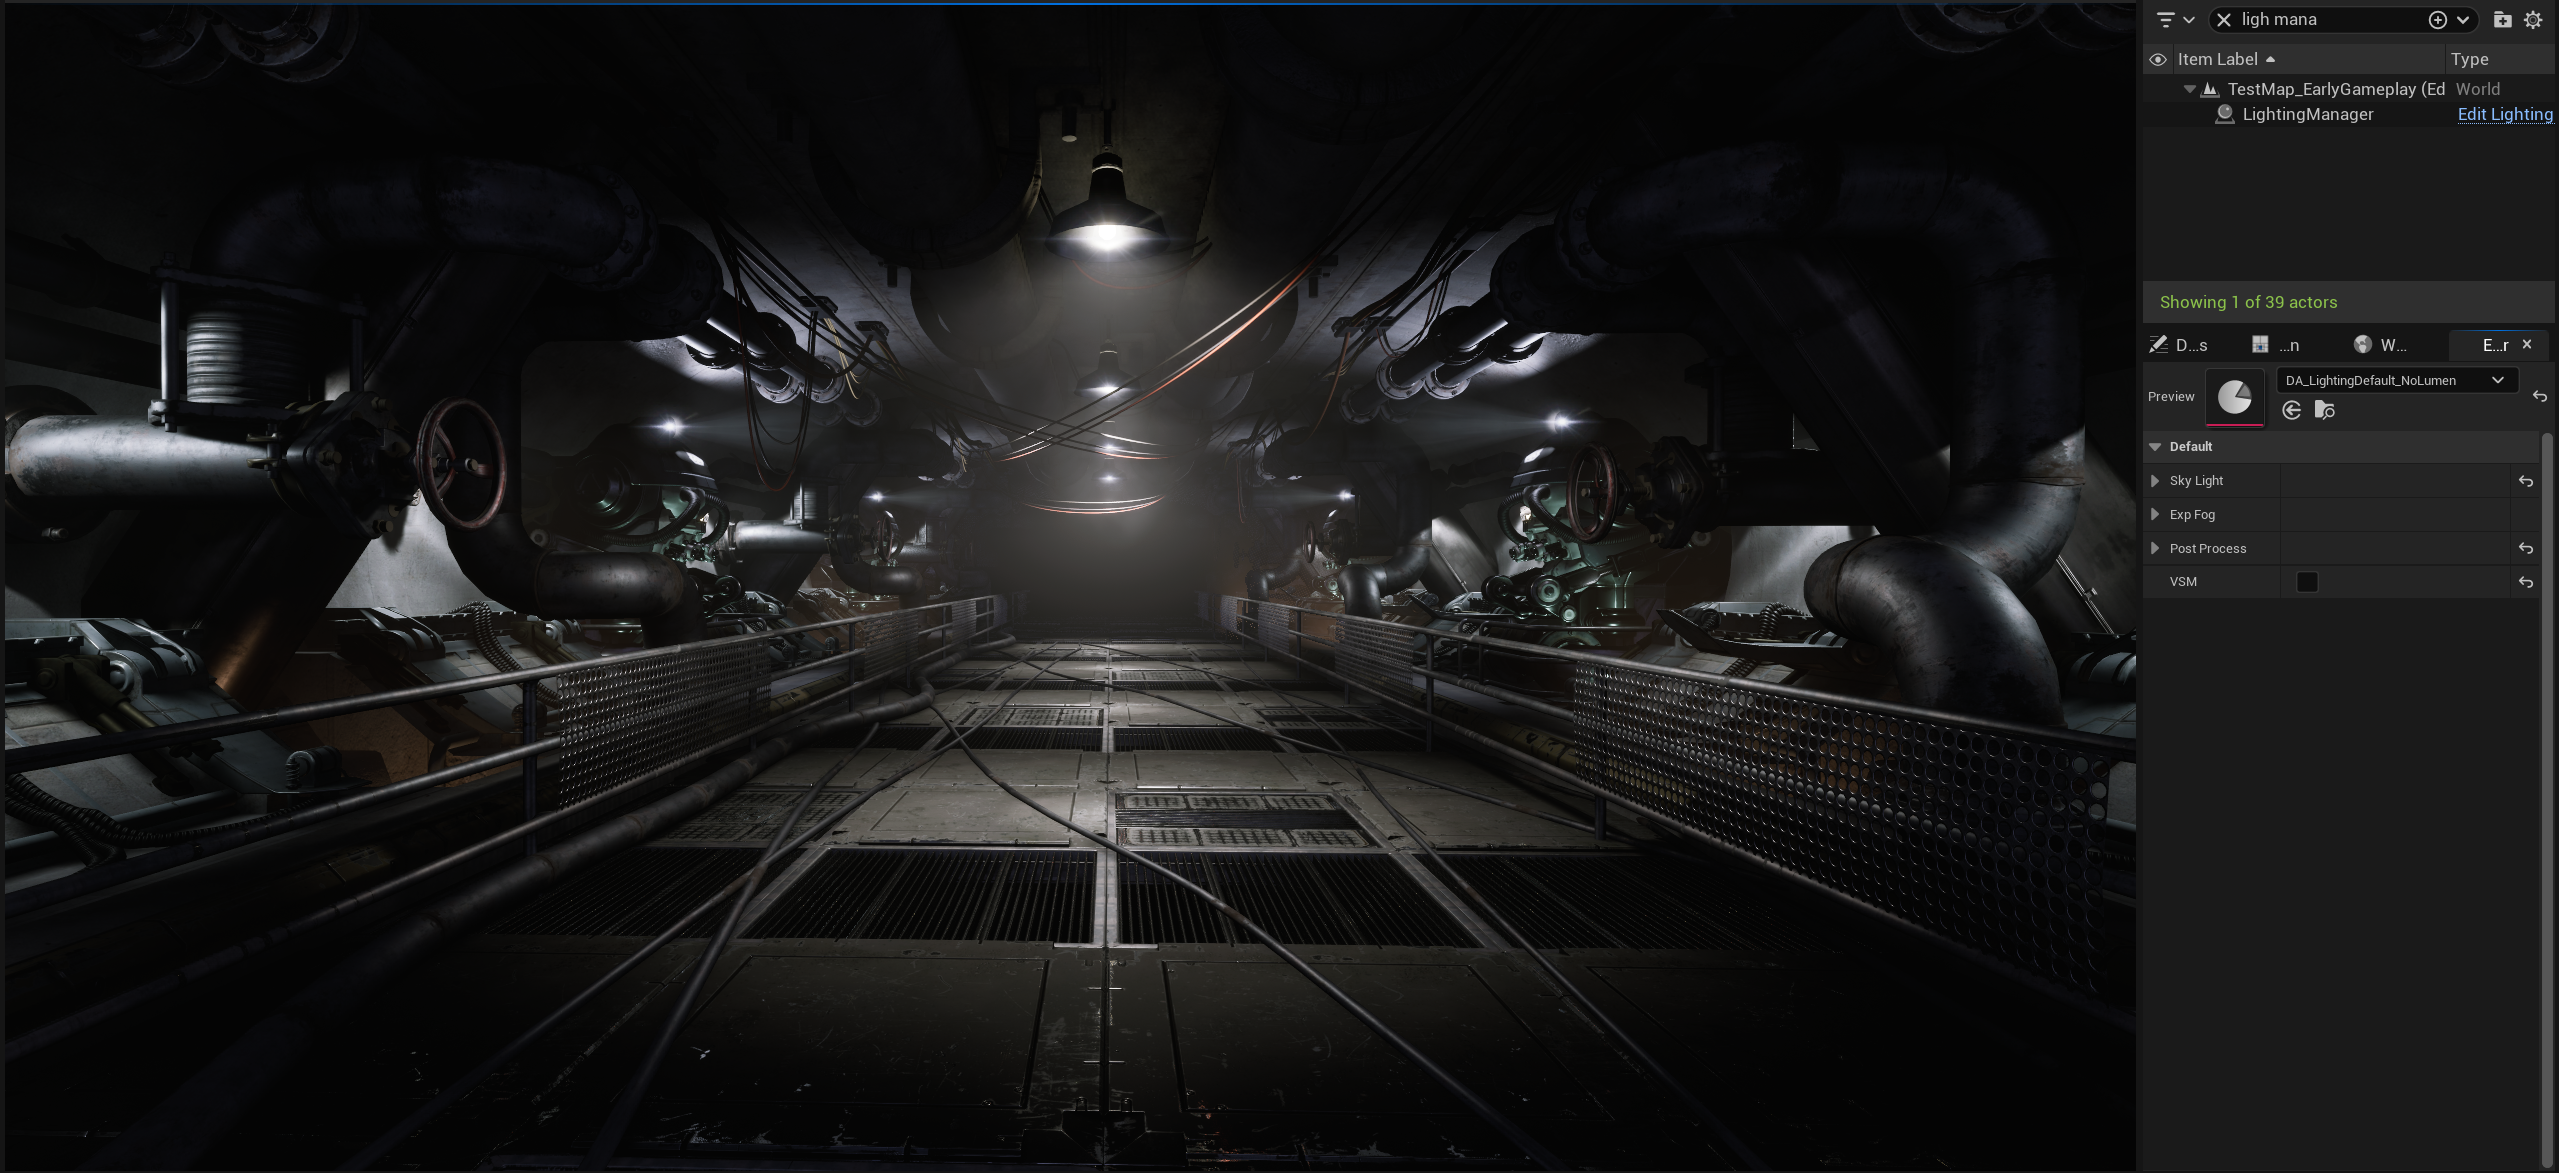
| VSM | bool | Ability to enable or disable virtual shadow maps. |
As you can imagine, you can extend this data asset to include additional features, such as:
- Clouds
- Sky dome
- Specific Lumen settings
- Other environment or rendering parameters
A similar system was created in Rogue Spirit, which significantly sped up lighting iteration.
I also implemented day-night support using a Sequencer created inside the data asset—something similar to Day Sequence but more modular and with weather graphs.
Lighting Manager
We need an actor to hold all the lighting components for us—such as the sky light, directional light, fog, etc.
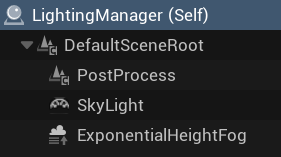
For now, our manager has three components:
- Postprocess
- SkyLight
- Exponential Height Fog
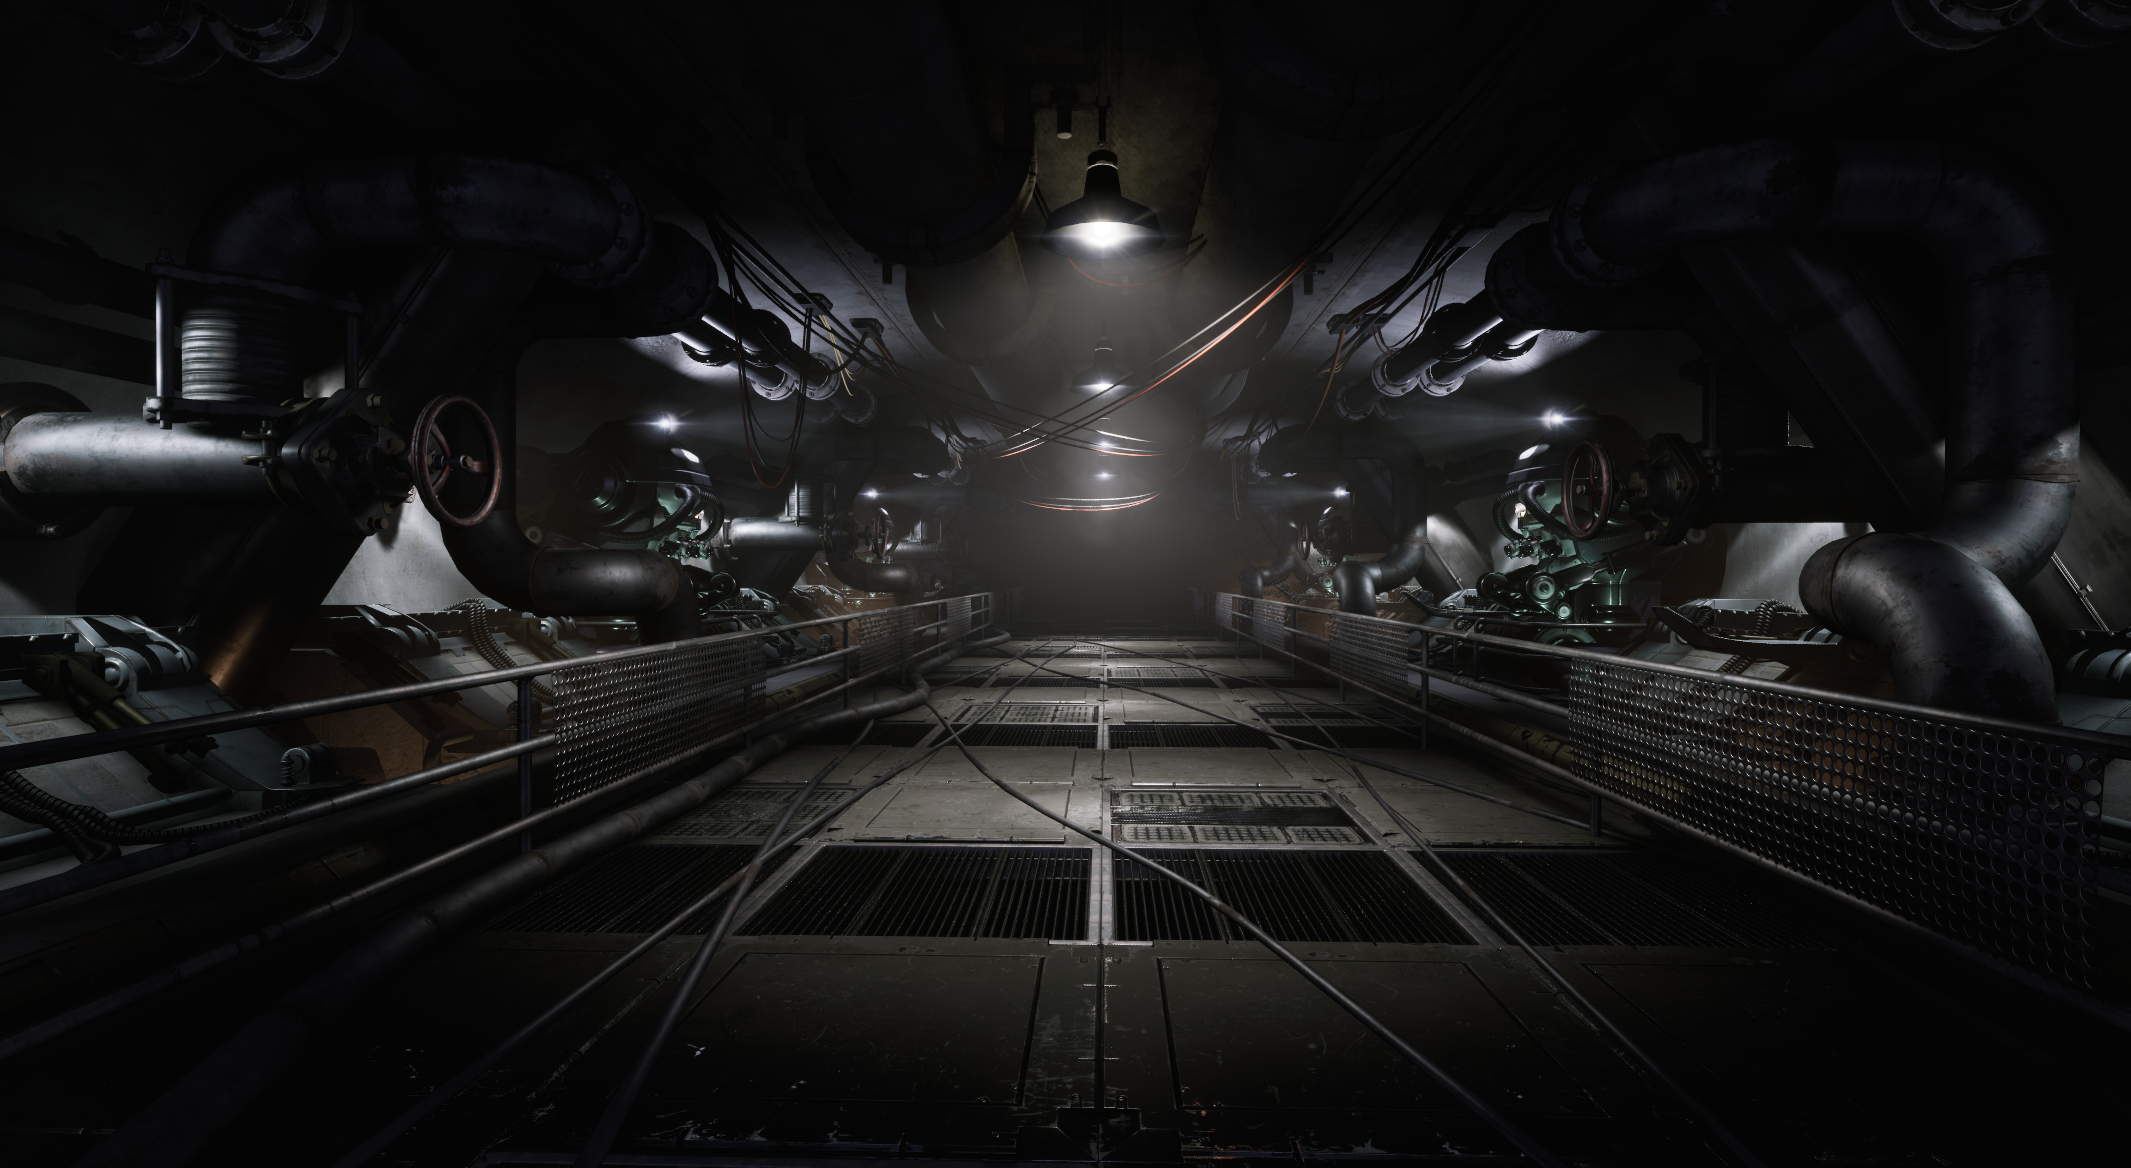
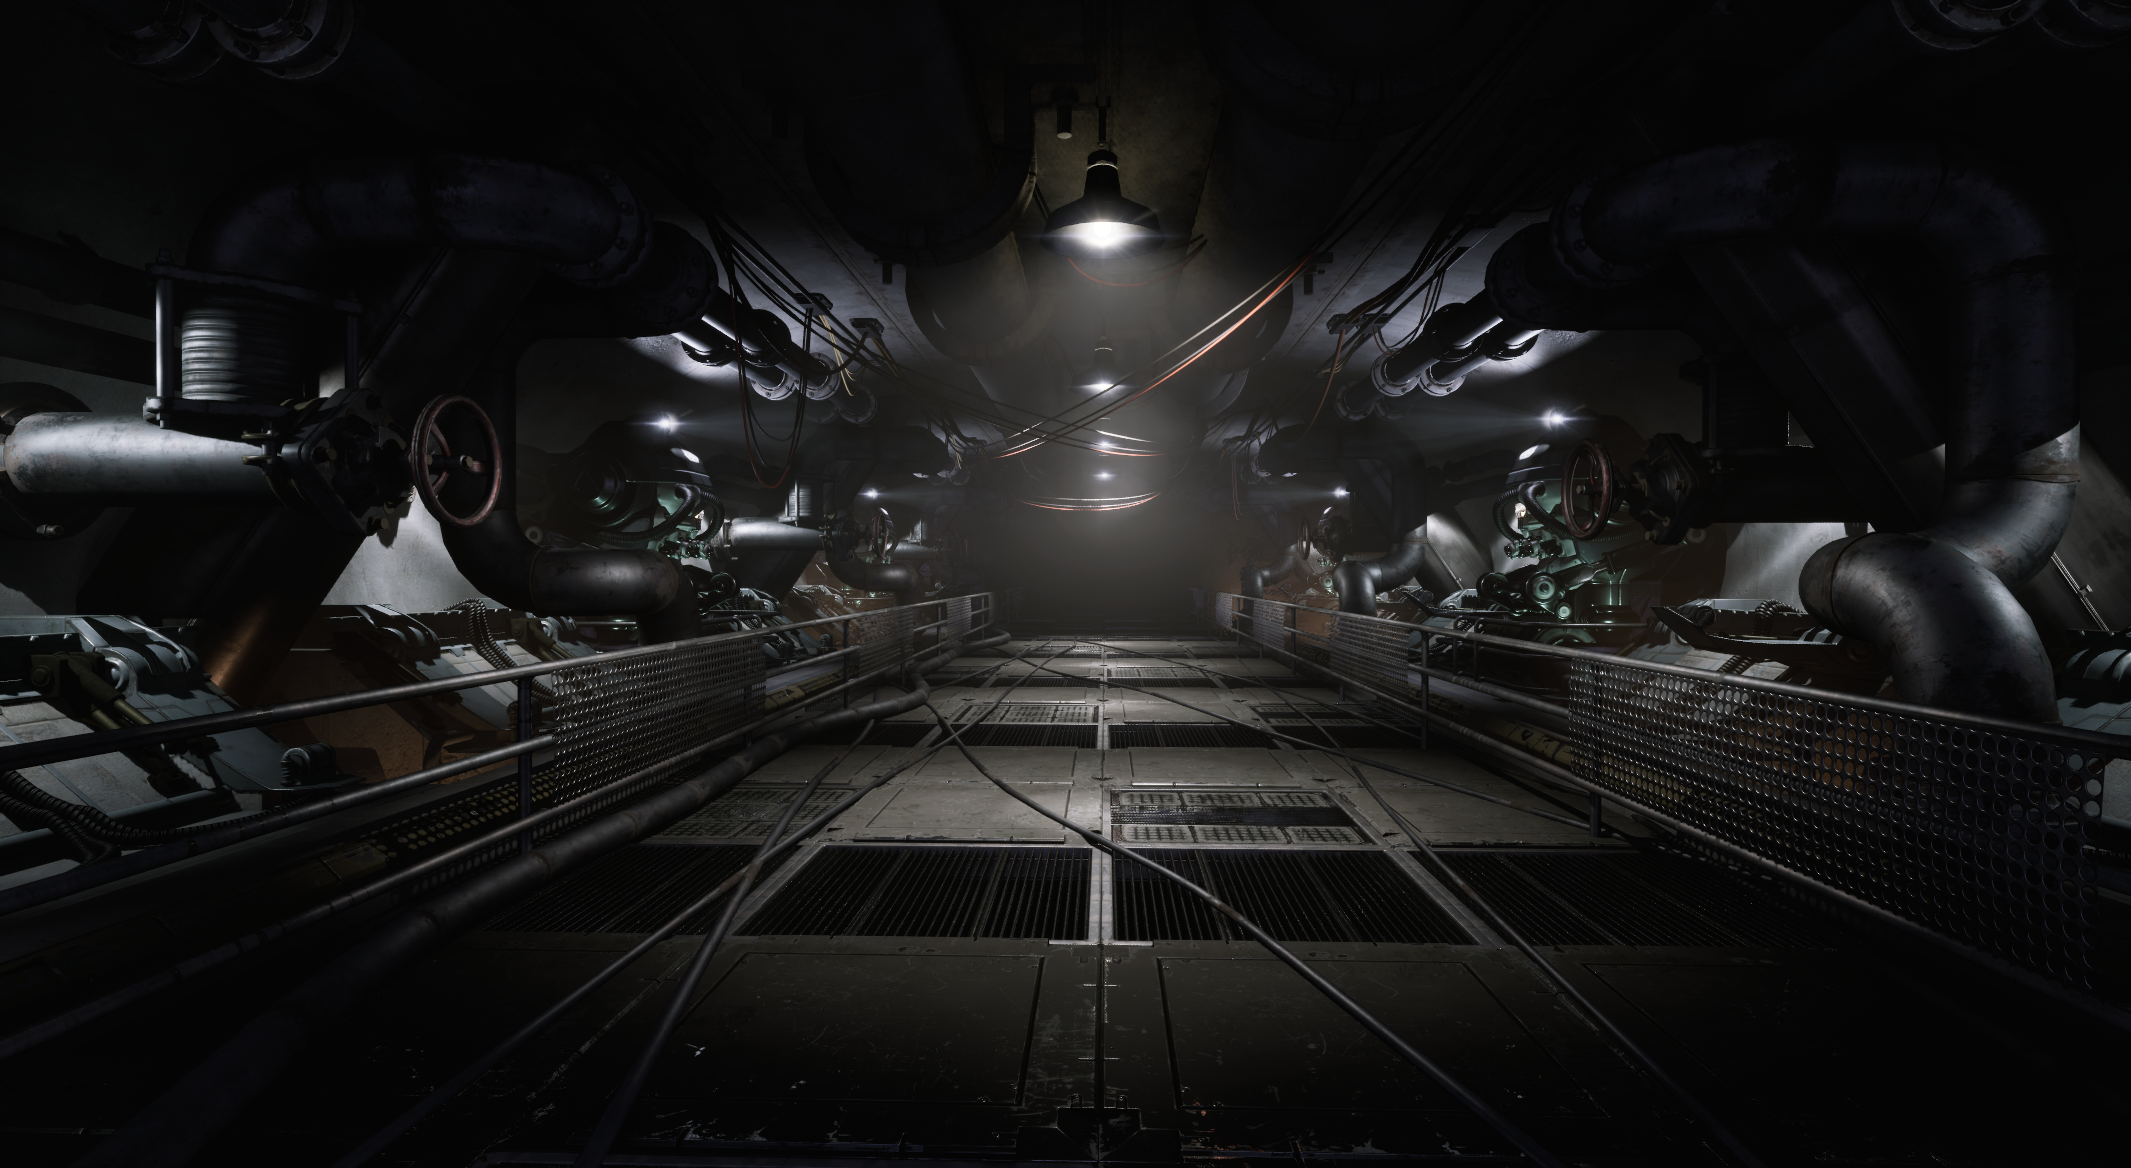
We don’t need anything more because our levels are indoor-based and the player cannot move around.
UpdateFromPreview (link)
This function is called from the editor to update variables based on the lighting scenario currently being previewed.
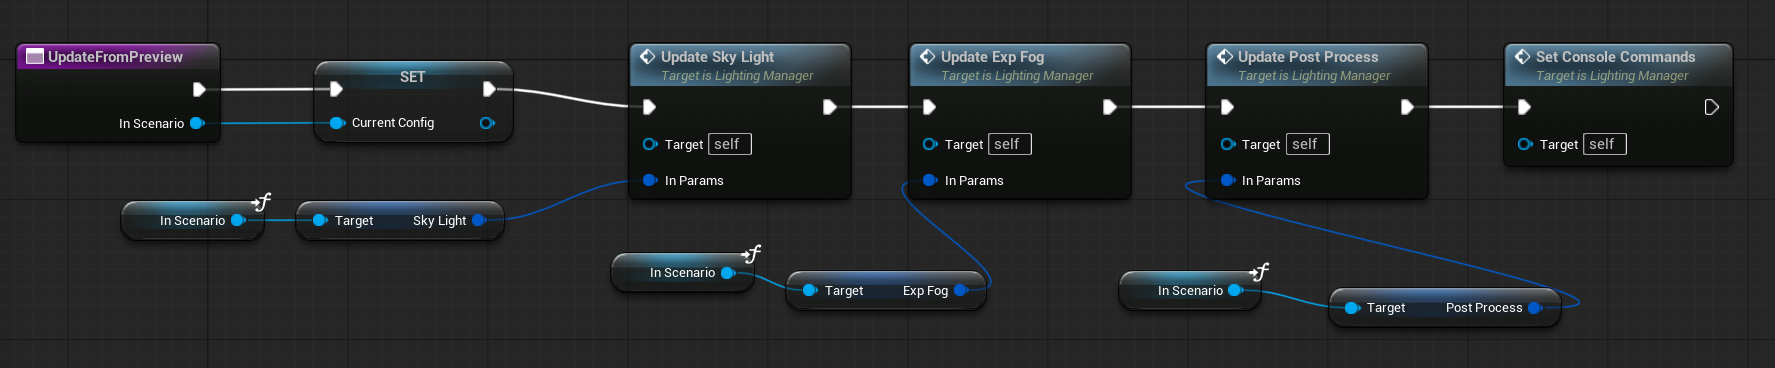
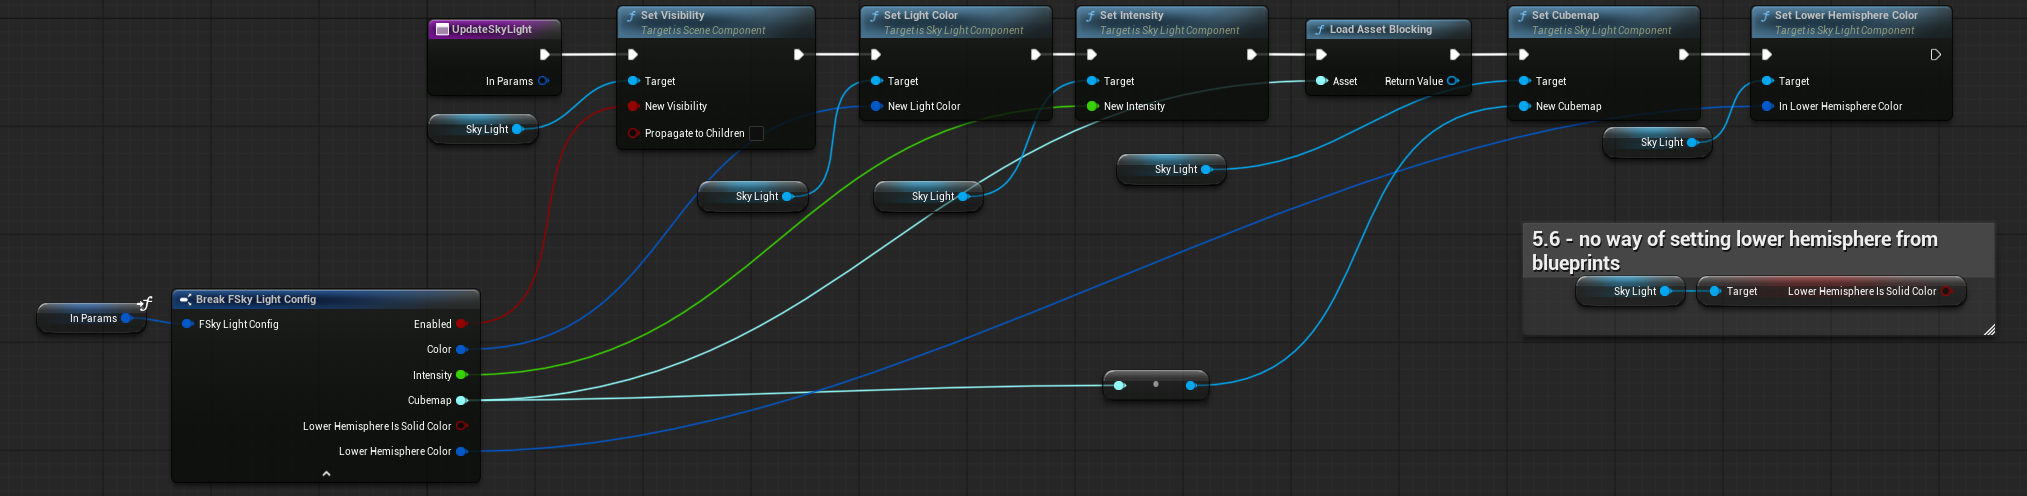
UpdateSkyLight (link)
This function takes our custom struct and updates the sky light parameters accordingly.
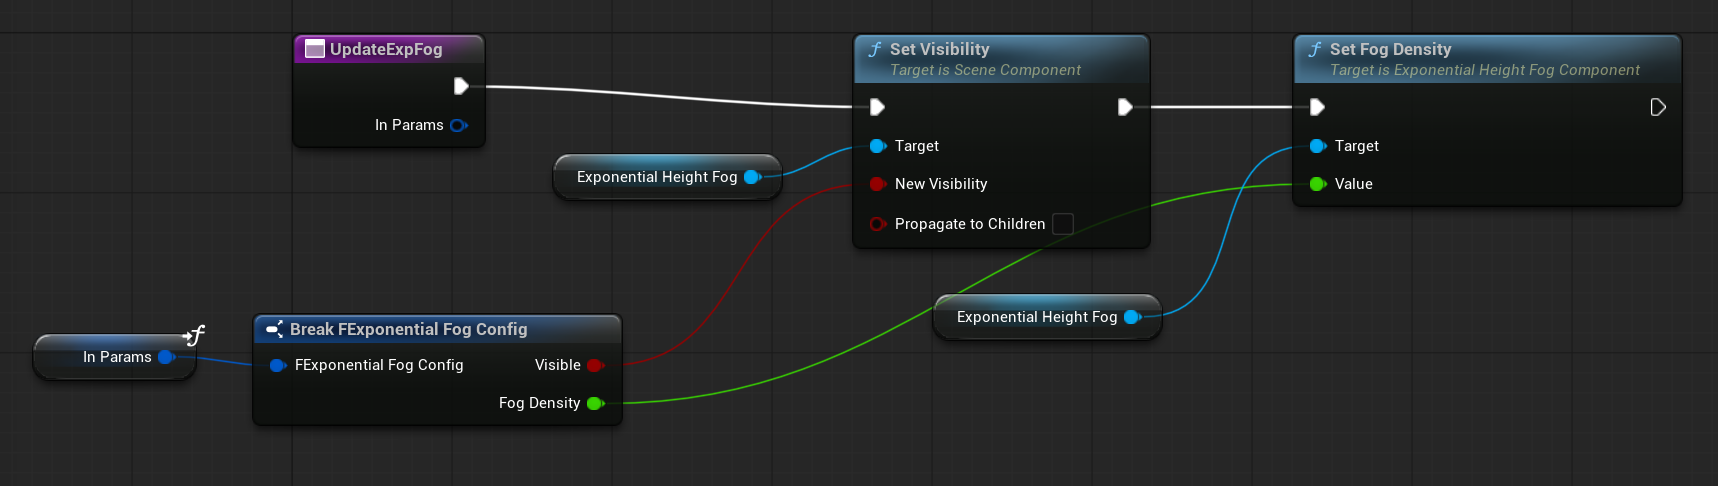
UpdateExpFog
Works the same way as the sky light update function, but for the exponential fog component.
UpdatePostprocess
The same as above but for the postprocess component.

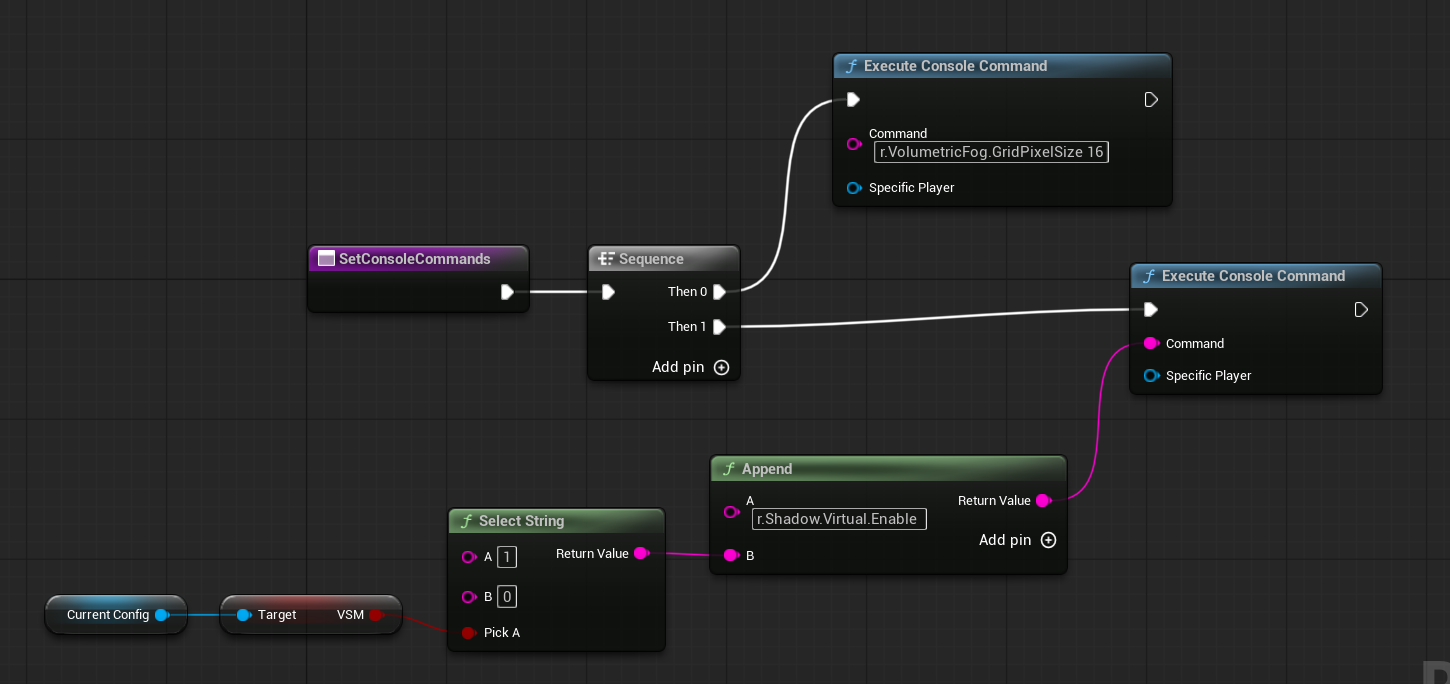
SetConsoleCommands
This function sets default console commands—such as enabling or configuring volumetric fog—as well as commands that the graphics artist can modify in the preset.
Lighting Preset Editor
In C++, you would typically use the PostEditChange function directly in the Data Asset to update the manager whenever values in the presets change. However, in Blueprints, this option isn’t available (yet).
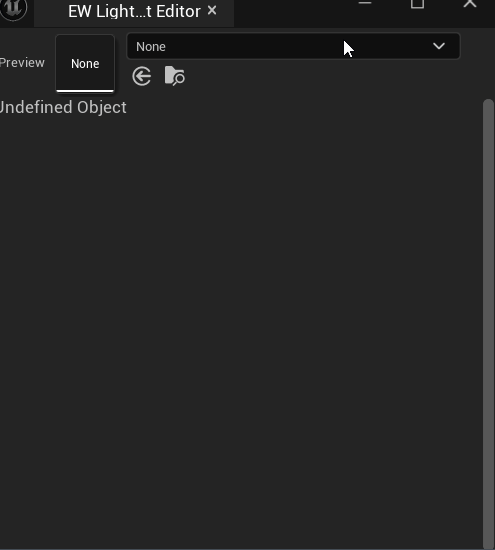
That’s why we need to create our own Editor Widget: EW_LightingPresetEditor.
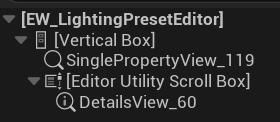
The Single Property View uses the Preview variable inside the widget.

The Details View uses this object to display and edit properties.
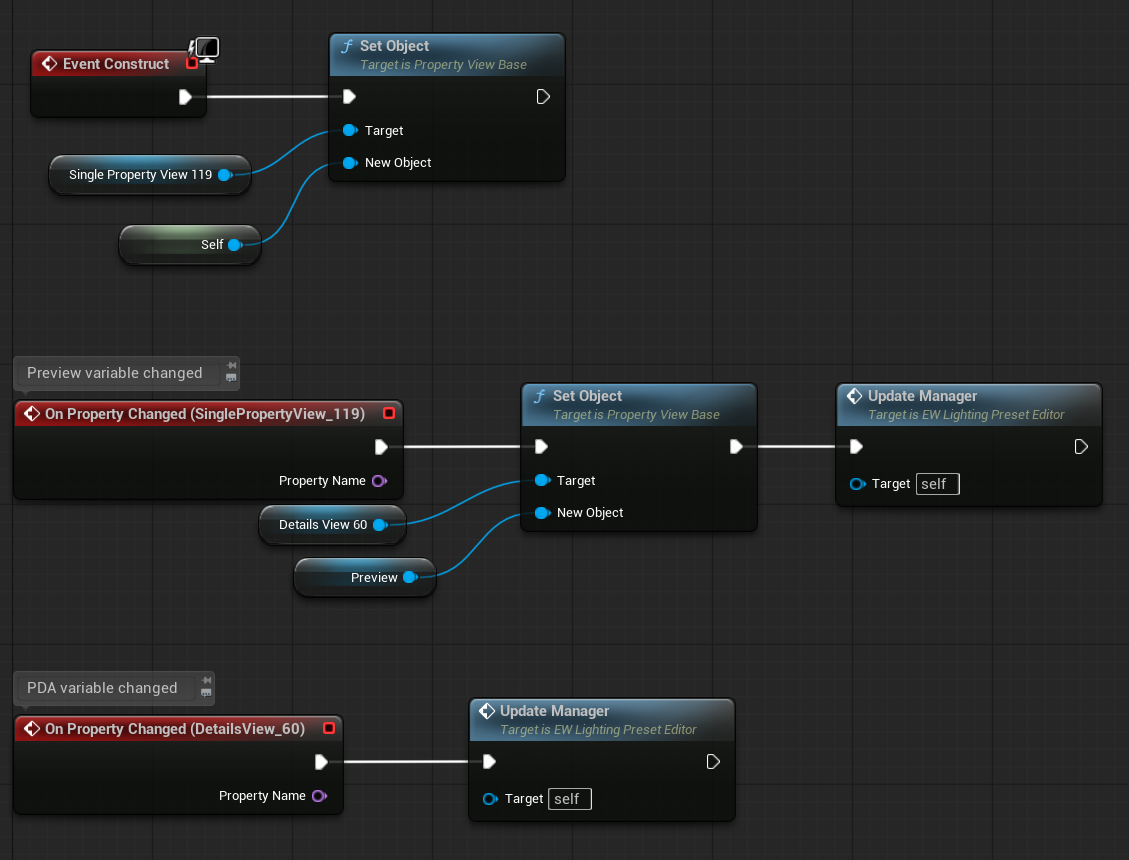
UpdateManager simply finds the manager actor and calls its UpdateFromPreview function.
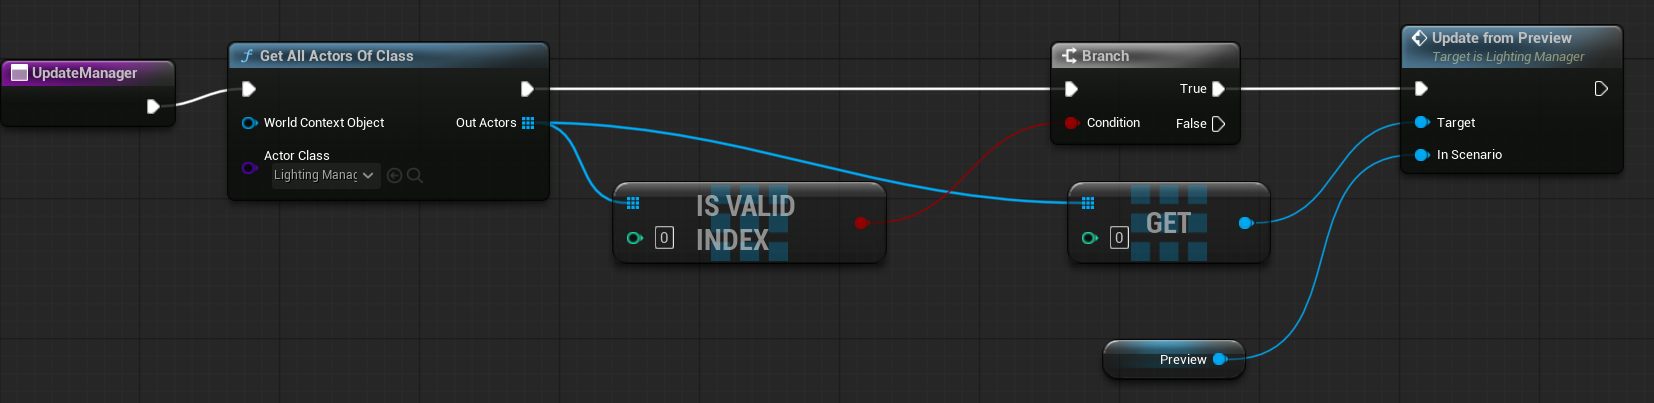
Basically, each time you change a property using this editor widget, the manager will update automatically.
Nanite?
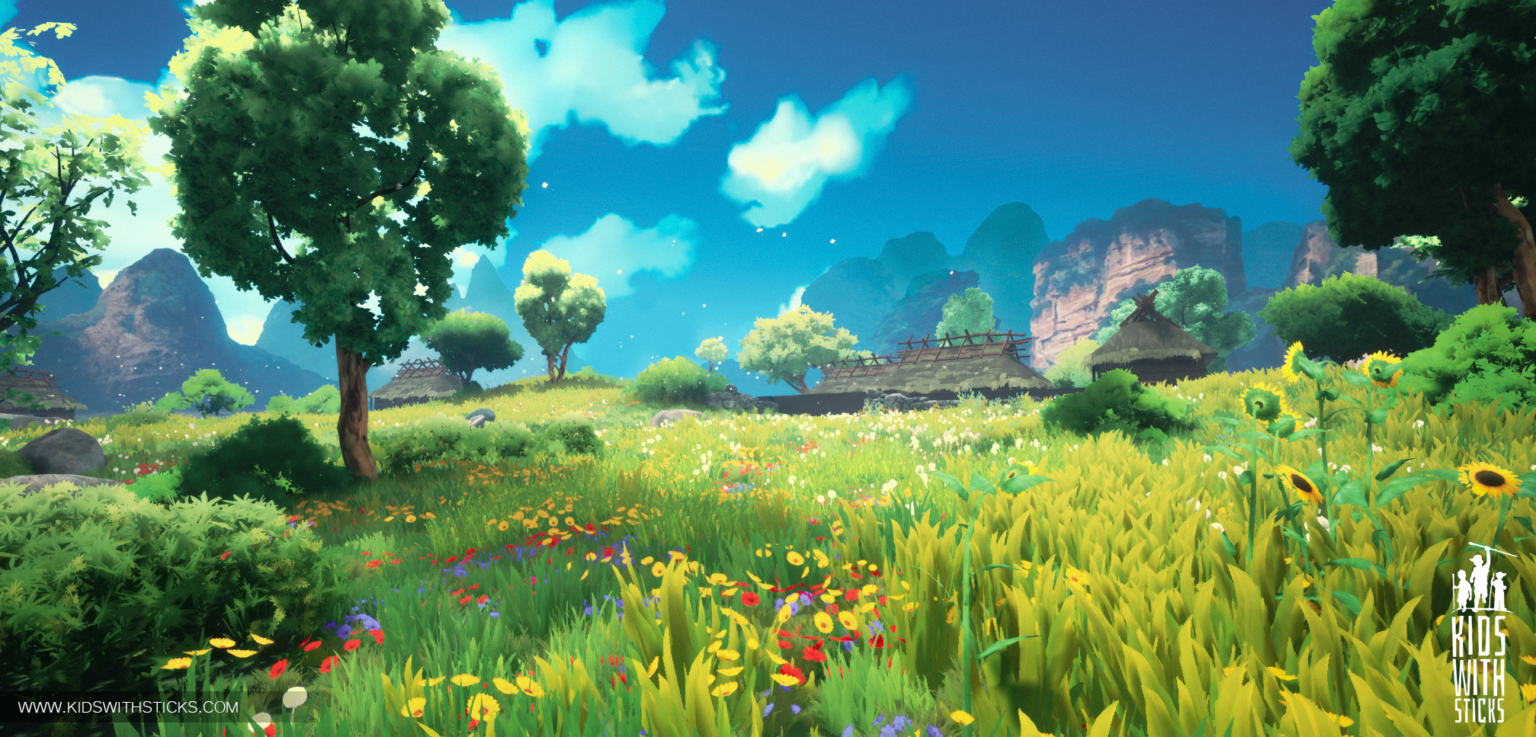
By default, Unreal Engine 5 comes with many features you may or may not need. The Shooter Tutorial is a standing shooter, which means there will be a small number of draw calls, and I have full control over how far the player can see.
Another point is that I don’t have assets that are well-prepared for Nanite. Here are the pros of using Nanite:
| No draw calls | If your game is draw call heavy (e.g., an open-world game), Nanite can be very helpful. | The Shooter Tutorial has about 800 editor draw calls, and this number will be even lower after optimizations. So, in our case, there are no performance gains here. |
| No LODs | Nanite doesn’t use the traditional LOD system, which means less work for your graphics artists but makes managing material complexity at different distances harder. | Since the Shooter Tutorial level is small, we can use LODs, so there are no gains here either. |
| No dedicated normalmap | Because Nanite uses tessellated geometry, you don’t need typical normal maps for geometry details—only small detail maps are needed. | However, the Infiltrator assets aren’t Nanite-enabled, so even if you enable Nanite, you won’t fully utilize its potential. Assets should be created with Nanite in mind. |
| Great VSM support | Virtual Shadow Maps work great with Nanite because Nanite needs detailed geometry. | You can use VSM without Nanite, but Nanite must be enabled in Project Settings to use VSM. The reason for this isn’t entirely clear. |
And of course, Nanite will look great when assets are properly prepared.
Some Cons (Keep in mind Epic is constantly improving Nanite):
| Constant performance impact | If you’re not using Nanite and add a Nanite mesh to your level, you will see a constant performance impact. So be careful when mixing Nanite meshes in non-Nanite scenes. |
| WPO | Using WPO on such dense meshes can have a big impact on performance. WPO is mostly used by grass, foliage, and trees, which is why Epic is still working on this topic. |
| Custom Depth, Stencil, Per Instance Vertex Color | Nanite meshes currently do not write to the custom depth or stencil buffers, which are essential for effects like outlines or post-processing masks. While Nanite meshes can import vertex colors, they do not support per-instance vertex color painting using the editor’s Mesh Paint mode. |
| Translucency | You need to rethink translucent materials like grass or trees — they should be meshes instead. Also, the lack of LODs can be a downside because we used to change material complexity with distance. |
| No LODs | This can be a downside because we used to rely on LODs not only for reducing geometry complexity but also to adjust material complexity based on distance. |
| More VRAM | Nanite geometry uses a lot of VRAM. |
| Dynamic Mesh | Because of the dense geometry, you should avoid dynamically changing mesh geometry. |
| r.Shadow.Virtual.SubsurfaceShadowMode 1 | Not sure if this is turned on by default in 5.6, but it changes how shadows look on trees. |
If you want to use Nanite, you should have assets prepared specifically for it—high polygon counts, normal maps only for fine details. This changes how you create your assets.
Since the Shooter Tutorial level isn’t very large and we don’t have assets prepared for Nanite, I’ve decided not to use Nanite for this project.
Virtual Shadow Map?
Deciding whether to use Virtual Shadow Maps (VSM) is a bit tricky for me right now because my graphics card is quite powerful, and I don’t see a major performance impact. VSM is generally less performant than traditional Shadow Maps, but I’d need to test it on an older computer and tweak settings like Distance Field Ambient Occlusion (DFAO) at a distance.
The main advantage of VSM is better shadow quality—especially sharper shadows and improved detail over long distances.
For now, I’m disabling VSM. When I focus on performance optimization, I’ll revisit VSM to see how it affects lower-spec systems and explore ways to optimize shadow maps for better quality.
Lumen?
In my opinion, the Shooter Tutorial isn’t about graphics—it’s about gameplay, and I want to support low-spec hardware. In the scene, Lumen takes about 1ms on the GPU.
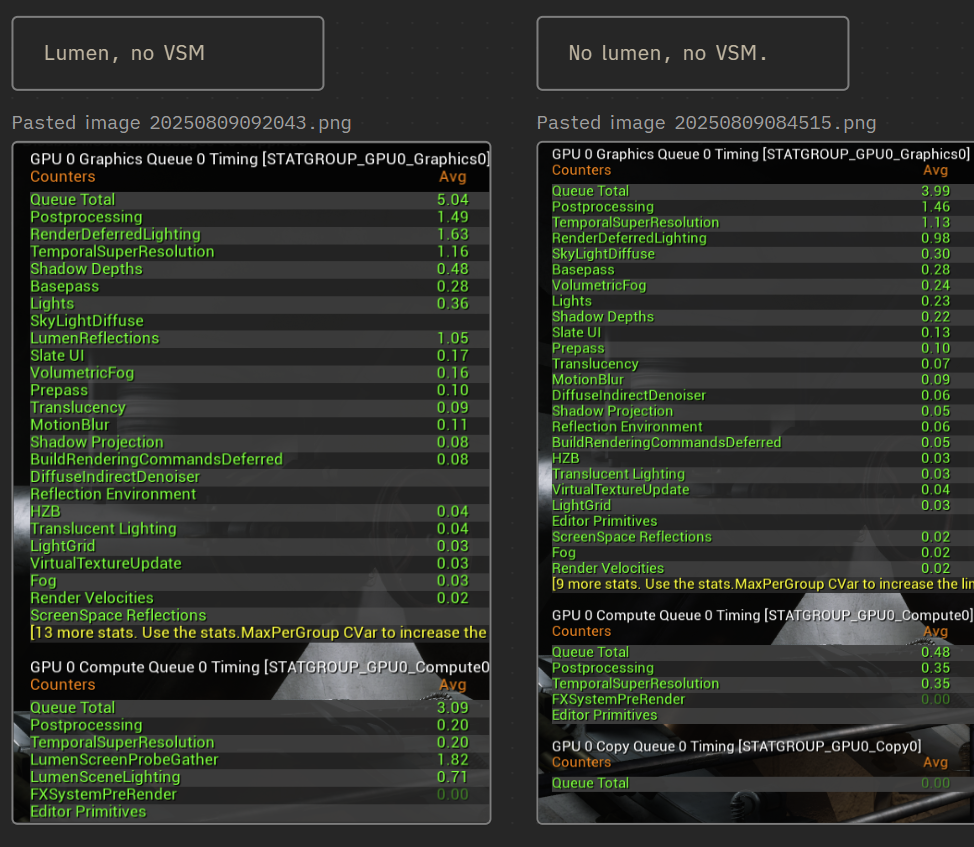
Honestly, I don’t see a big impact on graphics quality given that 1ms cost. At this stage (UE 5.6), Lumen still struggles with indoor scenes where there’s no directional light. Even Epic acknowledges this limitation.

I believe that by tweaking the sky light cubemap, DFAO, and some colors, I can achieve similar results to Lumen—especially since this is a static level and the player doesn’t move. I can fake a lot of effects.
That’s why I will not use Lumen – even with the cost of not having world space reflections.
Deferred Renderer?
It’s great that Unreal Engine still supports the Forward Renderer (like Unreal Engine 3), which means you can disable many of the “fancy” UE4 and UE5 rendering features and achieve the most performant rendering possible.
So, why not check how the Forward Renderer looks?
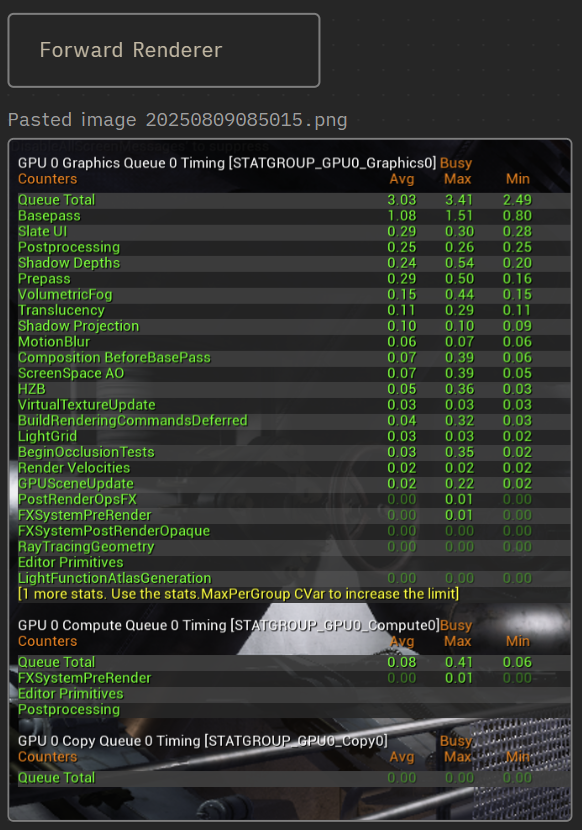
We gained another 1ms in performance, so that’s promising!
The Shooter Tutorial has great potential for using the Forward Renderer. I’d just need to work on the fog and fake some lighting effects using “fake volumetric” god rays.
For now I will use Deferred Rendering and wait for the performance on the low spec.
Conclusion
In this tutorial, we explored how to create a flexible and efficient lighting scenario system. By using custom data assets and a dedicated lighting manager, we gained the ability to quickly iterate and test various lighting presets without modifying the level itself.
We also discussed practical performance considerations, such as balancing the use of Lumen and the Forward Renderer, especially for supporting lower-spec hardware while maintaining visual quality – this modular approach to lighting empowers artists to experiment freely within defined parameters, speeding up workflows and enhancing the overall game experience.
Deciding whether to use Lumen, Nanite, VSM, Volumetrics, or Forward/Deferred rendering etc is challenging and should be made early in development, as it influences how you create the game and prepare assets. These choices also depend heavily on your team’s skills and the type of game you’re making.
Next – Shotgun implementation.

You must be logged in to post a comment.