
When working on a game, you’ll often create custom Editor Widgets—tools designed to help developers work more efficiently. These can include things like an Items Database, Dialogue Manager, Character Database, Profiling Tools, or Level Design Utilities—you name it!
Fortunately, there’s a simple way to add buttons directly to the Editor Toolbar without needing to create a C++ plugin or write Python scripts. It’s quick, easy, and extremely useful.
Level: Beginner
Type: Blueprint
Version: 5.5
Download Project
Base Classes
Let’s start by creating our base classes to follow a more modular approach.
First, create a new structure and name it FEditorToolbarButtonIconInfo. This struct will store information about the icons we want to use for our toolbar button. Add the following three FName variables to it:
SetName(Name)StyleName(Name)SmallStyleName(Name)
Now let’s create another structure to define the basic information about our toolbar button. Name it FEditorToolbarButtonInfo. This struct will hold all relevant metadata for a button. Add the following variables:
SectionName(Name) – The section of the toolbar where the button will appear.- Different sections will be separated using separator widget,
Name(Text) – The display name of the button.Tooltip(Text) – The tooltip shown on hover.Entry(Tool Menu Entry Struct) – The actual tool menu entry used to add the button.IconInfo(FEditorToolbarButtonIconInfo) – The icon info struct we created earlier.BlueprintEventToRun(String) – Name of the Blueprint event to execute when clicked.
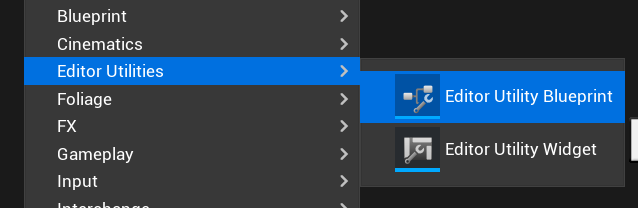
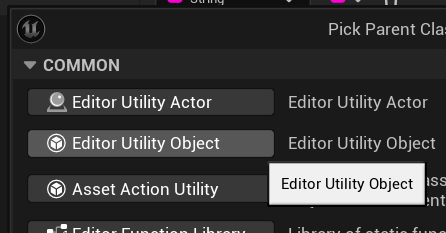
Now create new Editor Utility Object Blueprint and name it EUO_Startup.
This will be the place where we define and add our custom buttons to the editor toolbar.
Inside EUO_Startup create new Array Variable of a FEditorToolbarButtonInfo type, name it ToolbarMenuEntries and add one element into it.

This array serves as the configuration for your buttons, and you can add as many buttons as you need by simply adding more elements to it.
Note: The BlueprintEventToRun string includes a leading space (space) before the event name. This detail is important—you’ll learn why later in the tutorial.
Note: Entry->Name need to be unique! This is the button unique ID.
Implementation
Still within EUO_Startup, create a new function named AddToolbarMenuEntry.
InToolMenu(Tool Menu Object Reference)InEntry(FEditorToolbarButtonInfo struct Pass-by-Reference)
This function will handle the actual logic for adding a button to the editor toolbar based on the data stored in the InEntry struct. This is the implementation of the fuction.

When you’re working inside a function that has inputs, you don’t need to manually drag wires from the function node to access them. You can simply right-click in the graph and search for the input variable by name—Unreal will automatically provide a reference to it.

This keeps your graph cleaner and makes it easier to work with functions that have multiple inputs.
When using Set String Command, we’re leveraging the KISMETEVENT console command. This command allows you to trigger Blueprint events via the console, which is perfect for calling events defined in our Editor Utility Blueprint. This is the syntrax:
KISMETEVENT OBJECTTARGET EVENTNAME
So yeah—since we’re using KISMETEVENT to trigger Blueprint events, you need to define those events in your Blueprint in order to respond to the button clicks.
Create a new event called OpenTestWidget (matching the name you configured in the first entry of ToolbarMenuEntries). For every button entry you add, you’ll need to manually create a corresponding event like this.
Unfortunately, in Blueprints, we can’t pass parameters into these event calls, which means this process can’t be fully automated.
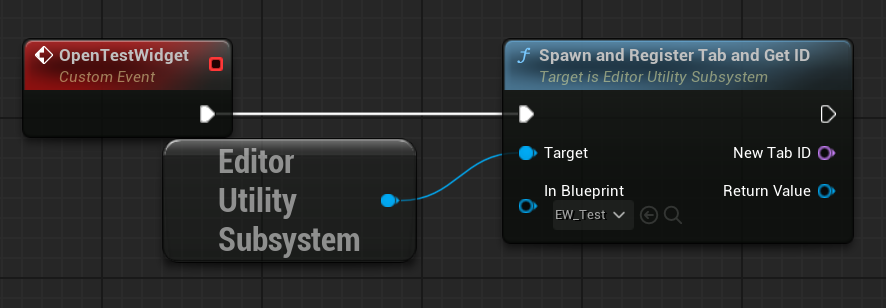
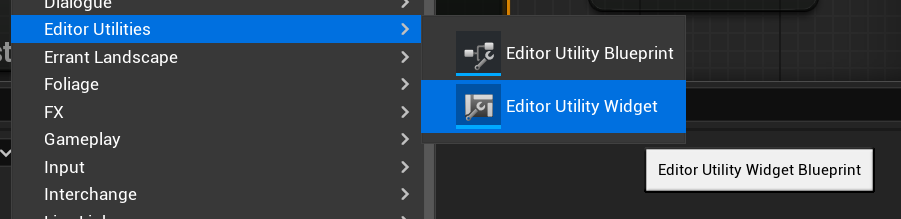
Now what we are missing is the widget itself. Create new Editor Utility Widget and name it EW_Test.
Make sure you update the Spawn and Register Tab function as well as the GetID function to reference your new widget (EW_Test).
Startup
Now you need to tell the engine to run EUO_Startup at startup. The EUO_Startup Blueprint itself will then react by adding the toolbar buttons.
To do this, navigate to your project’s Config/ folder and create a new .ini file named:DefaultEditorPerProjectUserSettings.ini
[/Script/Blutility.EditorUtilitySubsystem]
StartupObjects="/Game/Editor/Startup/EUO_Startup.EUO_Startup"
This setting tells the editor to run the specified Editor Utility Object when the editor starts.
Make sure the asset path you provide is correct—remember, Game refers to your Content folder. To avoid mistakes, you can simply copy the asset path directly from the object’s properties in the editor.

Now that the Editor knows which utility to run on startup, return to EUO_Startup and add a new event named Event Run.

As the name suggests, this event will be triggered when the utility widget is launched. This is the perfect place to add the code for registering and displaying your toolbar buttons.

This function locates the toolbar section (typically .User) and adds your custom buttons to it.
Now, restart your editor or project, and you should see the new button appear in the toolbar. Clicking it will spawn the EW_Test widget.
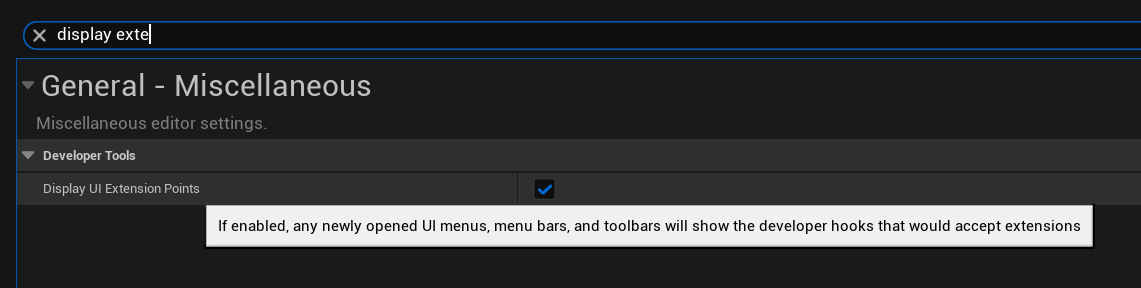
Display Extension Points
You can preview the names of available editor layout sections by going to Editor Preferences -> Display UI Extension Points
Now open the console and type ToolMenus.Edit this command will display more menu names and allow you to edit them directly.
Button Icons
You can check the SlateEditorStyle.cpp file to see all of the available editor style icons. This is a great way to find the best fitting icon for your button.
Keep in mind, you cannot use custom icons without modifying the engine’s source code and content (or by implementing your own custom plugin in C++), but fortunately, there are plenty of built-in icons to choose from.

Also there is a plugin for browsing the icons and styles as well you can try.
